How to create a new POS product
Last updated: May 9, 2026
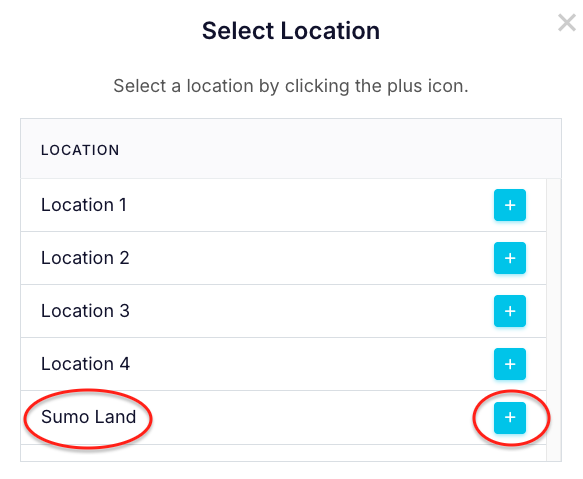
- Go to Operations POS Products – Navigate to Operations > POS Products and click + New POS Product. Select the location where the product will be available.
- Enter Product Details – Add the essential details required to create a new POS product, including its name, type, display order, printer settings, availability, and any special instructions or restrictions.
- Configure Costs & Taxes – Assign product cost, tax category and GL codes (if GL tracking is used). Settings can be customised per location (see below).
- Link stock item and recipe card - Ass stock tracking and ingredient management (if applicable)
- Categorise the Product - Assign category, subcategory, and report category to organise products and support reporting.
- Add Product Tags for Online Ordering - Assign dietary and highlight tags to products for Online Table Ordering.
- Save the Product – After entering all variables, click Save to reveal the Linked Locations, Delivery Types, and Image sections.
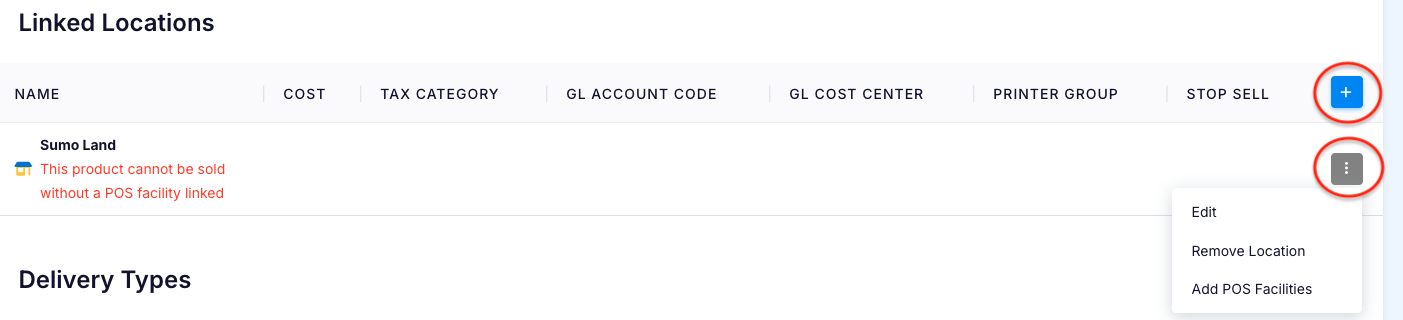
- Link to POS Facilities and Additional Locations – In the Linked Locations section, click the hamburger icon next to a location and select Add POS Facility. Use the blue plus sign to add the product to more locations.
- Add Locations Specific Product Variables - Manage differences in cost, tax, tracking, printers, and product availability across locations.
- Set up the Delivery Types (in progress)
- Upload an Image - In the Image section, upload an image from your computer with preferred dimensions 320 x 240 px.
- Assign Product Specific Attributes
For more details with regards to configuring a POS Product for Online Table Ordering, please reference help guide How to Configure a POS Product for Table Ordering
1. Go to Operations > POS Products
Navigate to Operations > POS Products and click on + New POS Product

If your business has multiple locations, select the location where this product will be available for sale. If you operate a single-location business or only have access to one location within the business, this screen will not appear.
2. Enter Product Details:
PRODUCT DETAILS

| Name |
|
| Priority |
|
| Type |
|
| Printer Group |
|
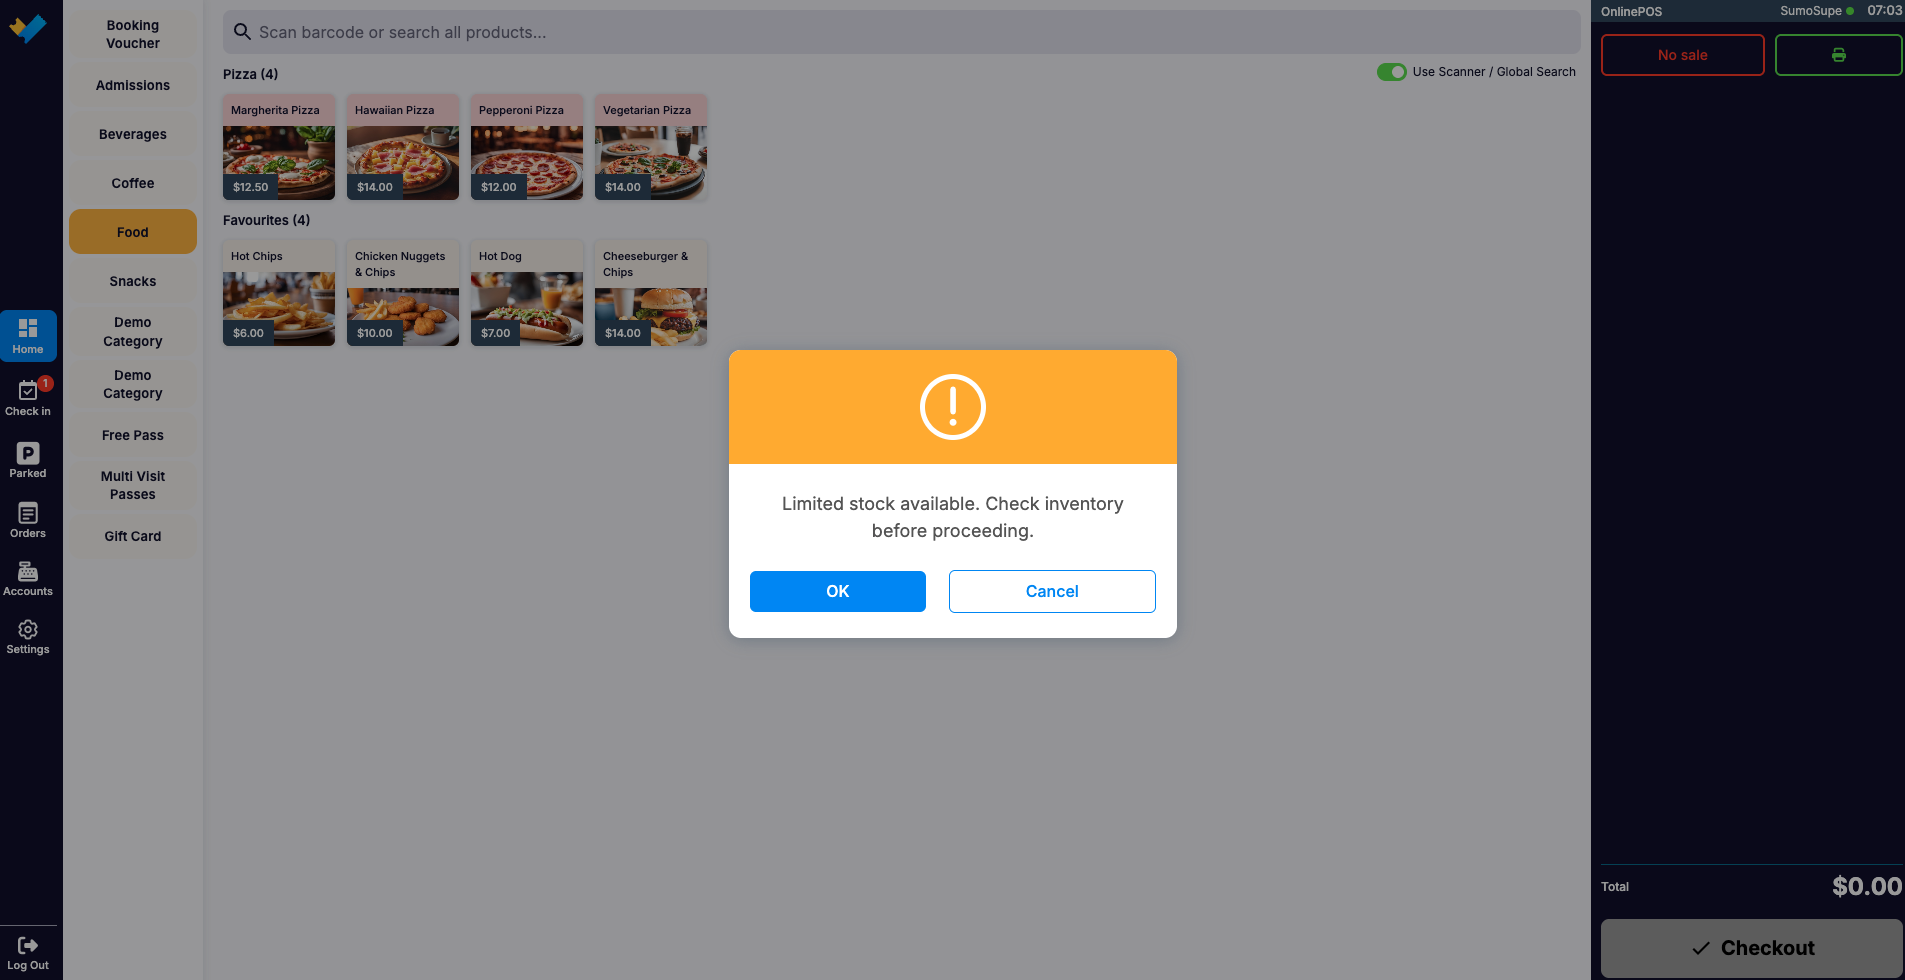
| Stop Sell | Yes - Can be used to permanently stop a product from being sold, or as a temporary stop when a product is unavailable (e.g., "Cheeseburger" temporarily out of stock). No - The product will be available for purchase. |
| Admin/POS Only | Yes - Restricts the product to Admin/POS users only, making it unavailable for online table ordering. No - The product will be available for online table ordering if your venue is using that feature. |
| Allow Decimals | Yes - Allows fractional quantities (e.g., 1.5 kg of fruit or 0.75 meters of fabric). No - Restricts quantities to whole numbers (e.g., 1 item, 2 bottles). Note: This setting is only applied to items sold in POS and is useful for products sold by weight, length, or volume rather than fixed units. |
| Allow Price Change | Yes - Allows staff to adjust prices for discounts, promotions, custom pricing, or manual corrections (only in POS). No - Price cannot be changed which ensures consistency and prevents unauthorised changes. |
| Warning Message |
|
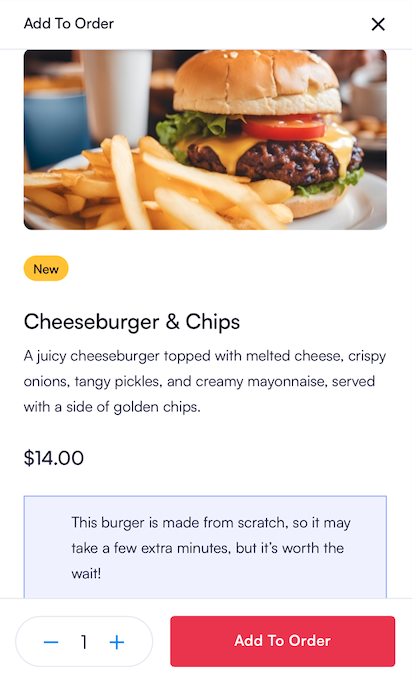
| Description |
|
| Extra Info |
|
3. Configure Costs & Taxes
COSTS & TAXES
Important note: For businesses with multiple locations, all of these "Costs and Taxes" variables can be customised per location if needed. Otherwise, these settings remain consistent across all locations. These variations can be managed in the Linked Locations section (see below).

| Cost |
|
| Tax Category |
|
| GL Account Code |
|
| GL Cost Center |
|
4. Link stock item and recipe card for stock tracking and ingredient management

| Stock Item |
|
| Recipe Card |
|
5. Categorise the Product
Important Note: Categories must be created in Operations → Categories before they can be linked here. Refer to help document Operations - Categories for more information.

| Category |
|
| Sub Category |
|
| Report Category |
|
6. Add Product Tags for Online Ordering
Important Notes:
Product Tags must be created in Settings → Product Tags before they can be linked here. They are only relevant to Online Table Ordering and will not be shown in POS.

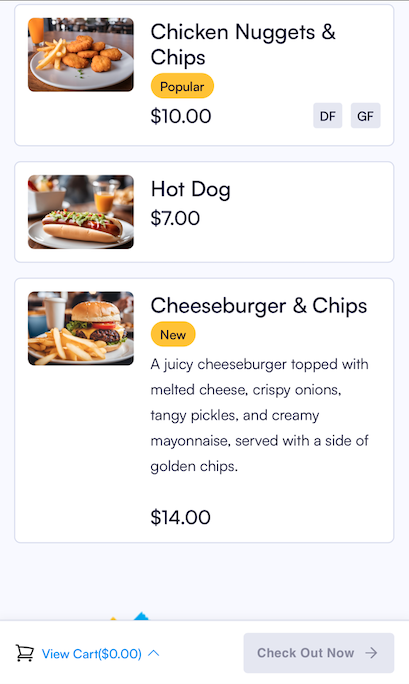
| Dietaries | Tags that indicate specific dietary needs or restrictions, such as Gluten-Free, Vegan, or Nut-Free. These help customers identify products suitable for their dietary requirements |
| Highlights | Tags used to showcase special features or promotions, such as Best Seller, New Item, or Limited Time. These draw attention to key products |
7. Save the Product
Once all variables have been entered, click SAVE.
The Linked Locations, Delivery Types and Image sections will appear.
8. Link to POS Facilities and Additional Locations
For this POS product to be available for sale, it must be linked to the relevant POS facilities. To do this, click the hamburger icon next to the location and select Add POS Facilities:
If the POS product will be available at additional locations, use the blue plus sign in the Linked Locations section to add them. For each POS facility within a location, repeat the process by clicking the hamburger icon and adding the relevant POS facility.
9. Add Location Specific Variations:
Click the hamburger icon next to the location where this product requires a different price, tax category, or GL tracking from the global settings.
Click on Edit
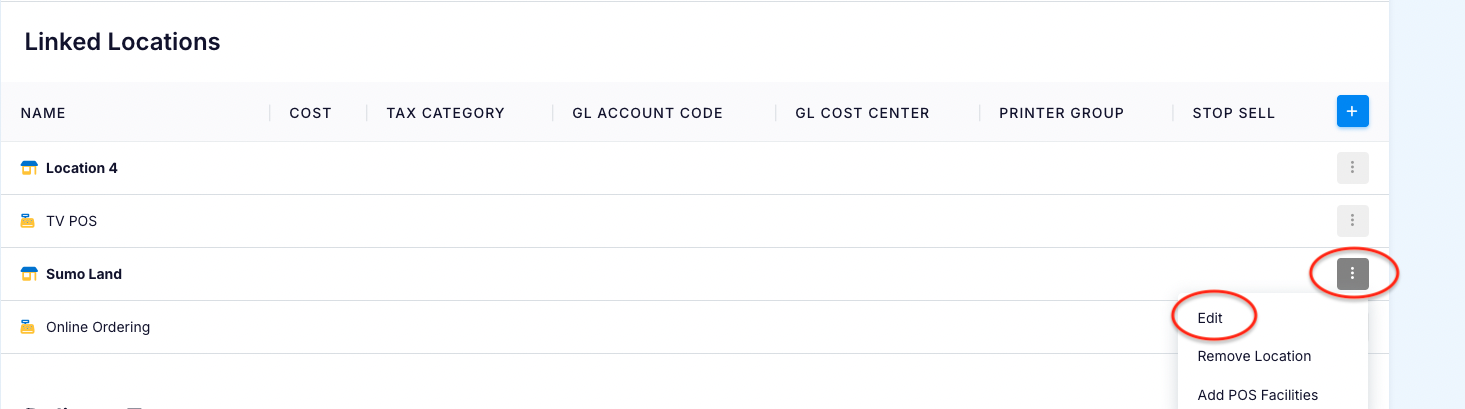
These fields will now be visible. Any values entered here will apply only to the selected location. If left blank, the product will use the default Costs and Taxes set at the global level.

10. Set up the Delivery Types
(in progress)
Use the blue plus sign in the Delivery Types section to add delivery types

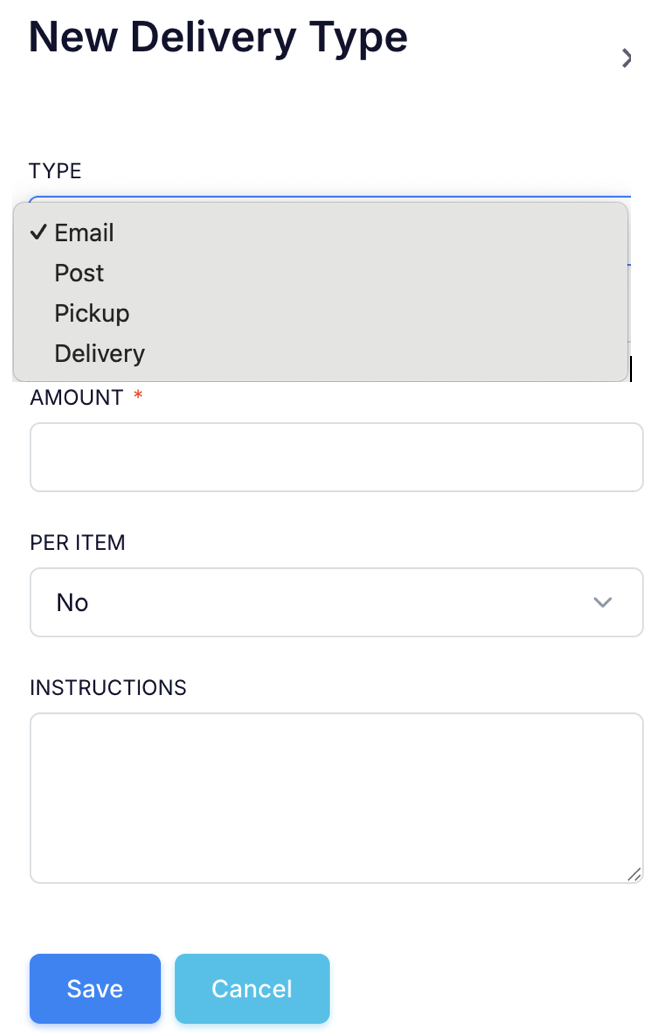
| Type | Post Pickup Delivery |
| Amount | Cost of the delivery |
| Per Item | Yes - the delivery cost is number of products purchased × Amount No - it is simply the Amount |
| Instructions |
|
11. Upload an Image
To upload an image, click the Upload Image button.

Click on Drop you image here and then select the image you wish to upload from your computer. Image dimensions should be 320 x 240 px:

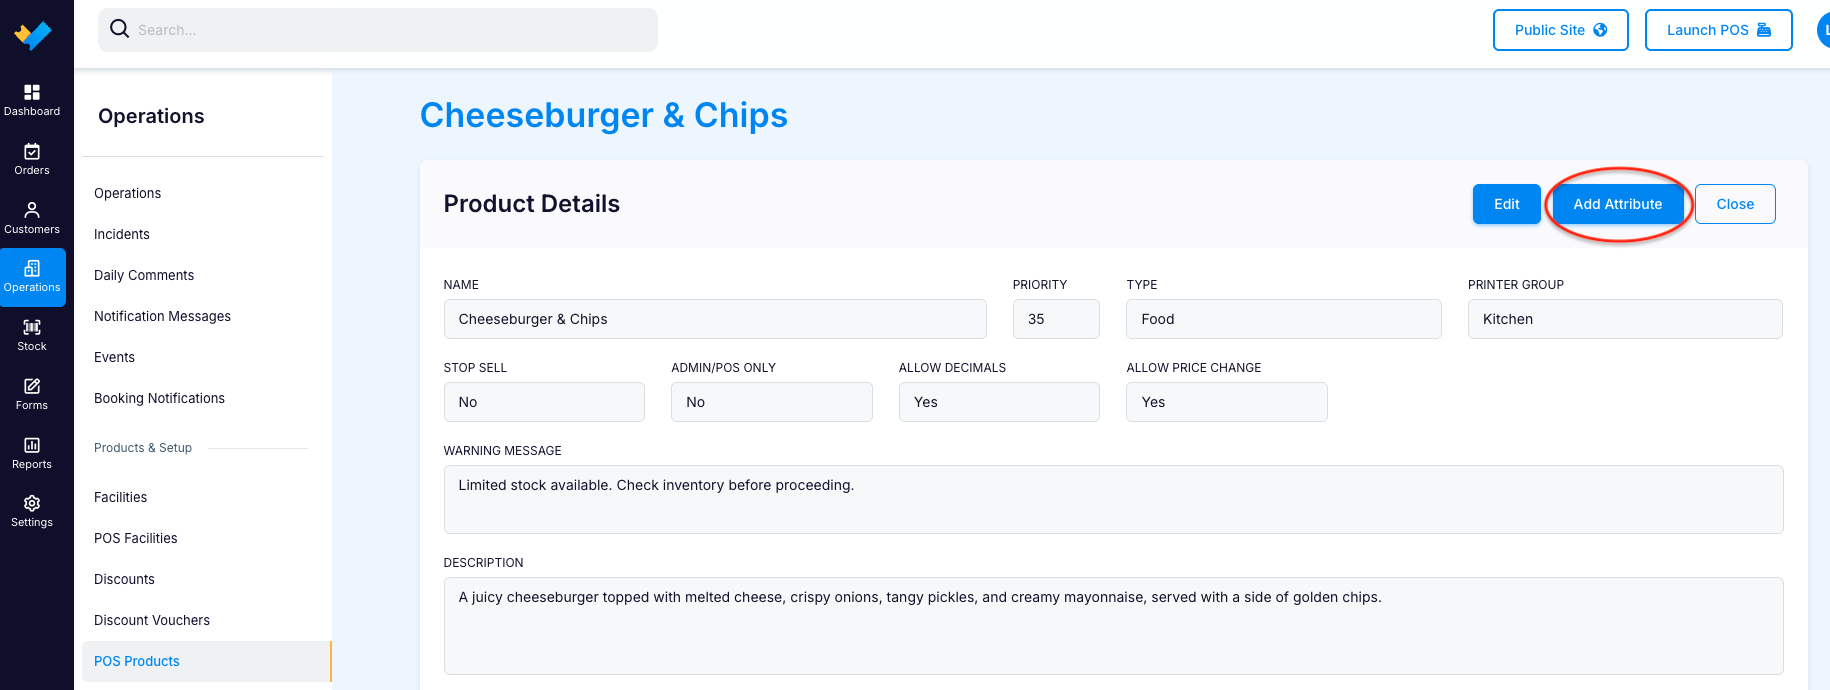
12. Assign Product Specific Attributes
Attributes can be assigned at the category or subcategory level for shared traits, but product-specific attributes should be set at the product level.
To add attributes, first SAVE the POS Product you have created and then click the Add Attributes:
You will now see these variables:
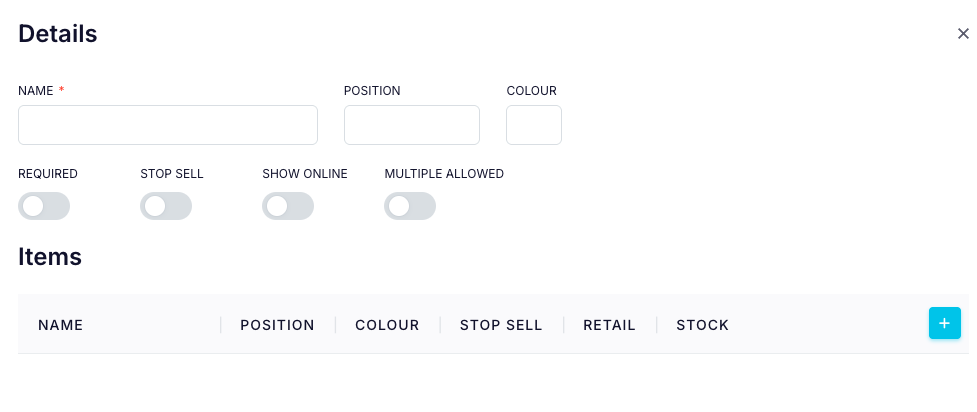
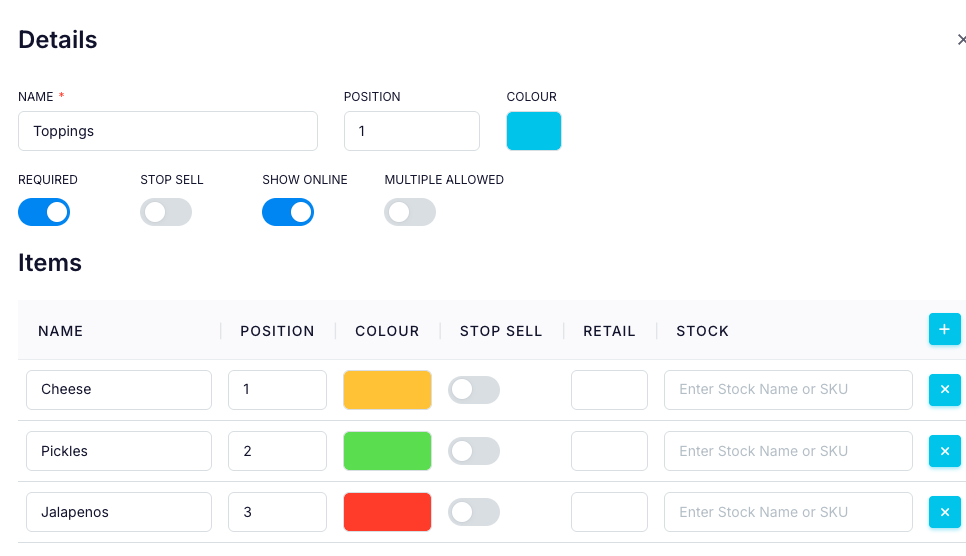
PRODUCT ATTRIBUTES DETAILS
| Name |
|
| Position |
|
| Colour |
|
| Required | Yes - the customer is required to choose an option. For example, with a "Size" attribute that includes Small, Medium, and Large, the customer must select one size. No - it doesn’t matter if the customer selects an option. For example, with a "Sauce" attribute (Tomato Sauce, Mustard, BBQ), the customer can choose a sauce or leave it unselected without affecting the order. |
| Stop Sell | Yes - the attribute is unavailable for selection, either temporarily or permanently. No - the attribute remains available for selection. |
| Show Online | Yes - the attribute will appear online when using table ordering No - it will be hidden from online customers but will still be visible in POS. Note: By default, the Show Online setting is set to No. It must be changed to Yes if the attribute needs to be displayed for online table ordering. |
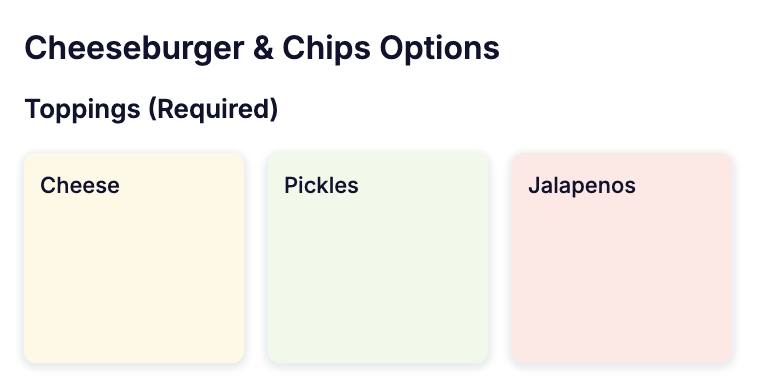
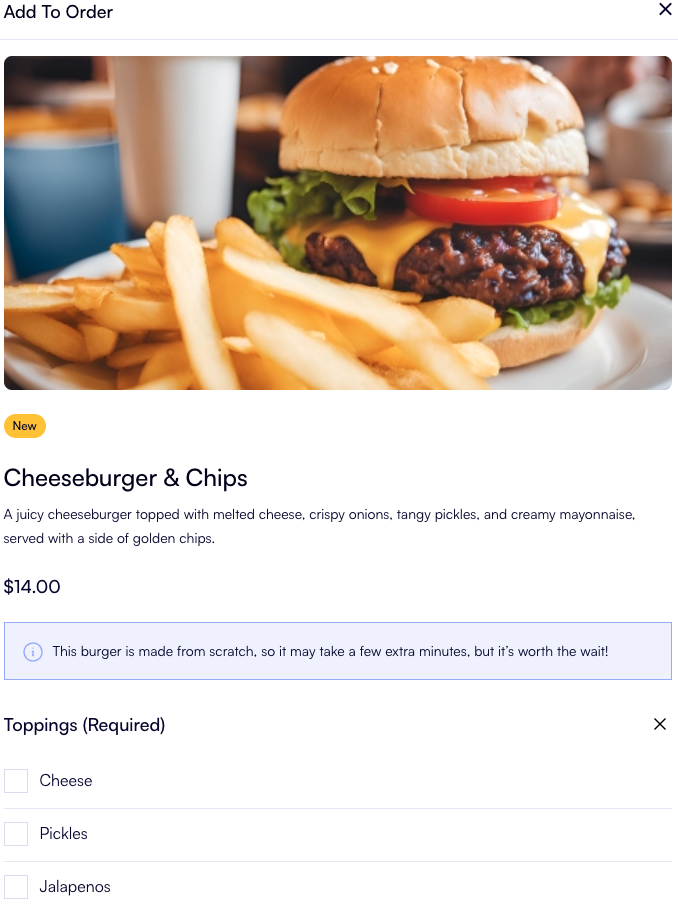
| Multiple Allowed | Yes - Customers can choose multiple options (e.g., selecting both Cheese and Pickles as burger toppings). No - Only one option can be selected. For example, with the "Multiple" setting set to N for a "Size" attribute (Small, Medium, Large), customers can only choose one size, not multiple. |
Click on the blue PLUS sign next to ITEMS to add ITEMS to the Product Attribute
PRODUCT ATTRIBUTES ITEMS
| Name |
|
| Position |
|
| Colour |
|
| Stop Sell | Yes - the attribute item is unavailable for selection, either temporarily or permanently. No - the attribute item remains available for selection. |
| Retail |
|
| Stock |
|
13. How will it look?
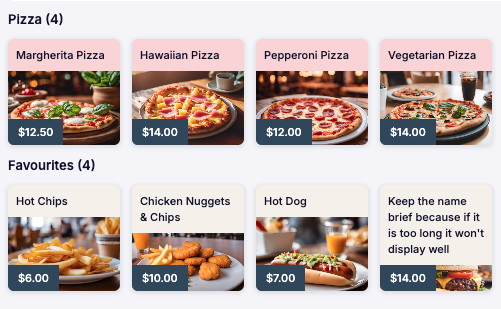
Name (remember to keep the name brief as a longer name won't display well in POS, see below):
Warning Message (only shows in POS):
Description (only shows online):
Extra Info (only shows online):
Allow Decimals (only applicable in POS):
This will appear when a POS Product with Allow Decimals setting enabled (YES) is added to the cart:

Colour of Attributes:
Attribute colours will be displayed in POS like this:
Attributes displayed in Online Table Ordering do not show colours:
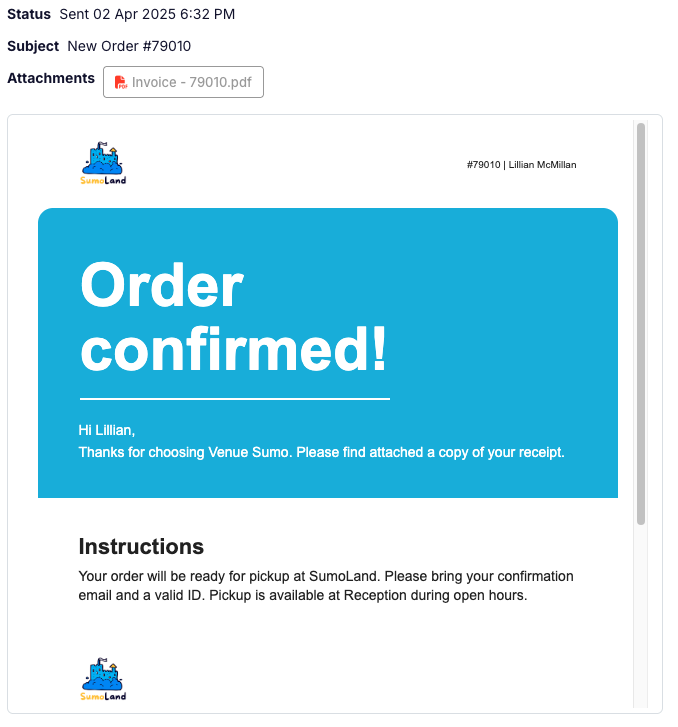
Delivery Instructions will be visible on the email that is sent to the customer: