Setting Up Windcave Payment Gateway and Payment Terminals
Last updated: July 2, 2026
Overview
This article walks you through connecting Windcave as your payment gateway in VenueSumo and linking your physical payment terminals so you can process card payments through your POS.
Before You Start
Prerequisite: An active Windcave account with API credentials (contact your VenueSumo account manager or Windcave support to get set up).
Prerequisite: Windcave-issued Station ID, User, and Key for each physical terminal.
Steps
Step 1: Create a Windcave Account
Contact your VenueSumo account manager to be introduced to Windcave. Once your account is active, Windcave will provide your API credentials.
Step 2: Add Windcave as Your Online Payment Gateway
This will be used to process online transactions via your booking site.
Log in to your VenueSumo back office.
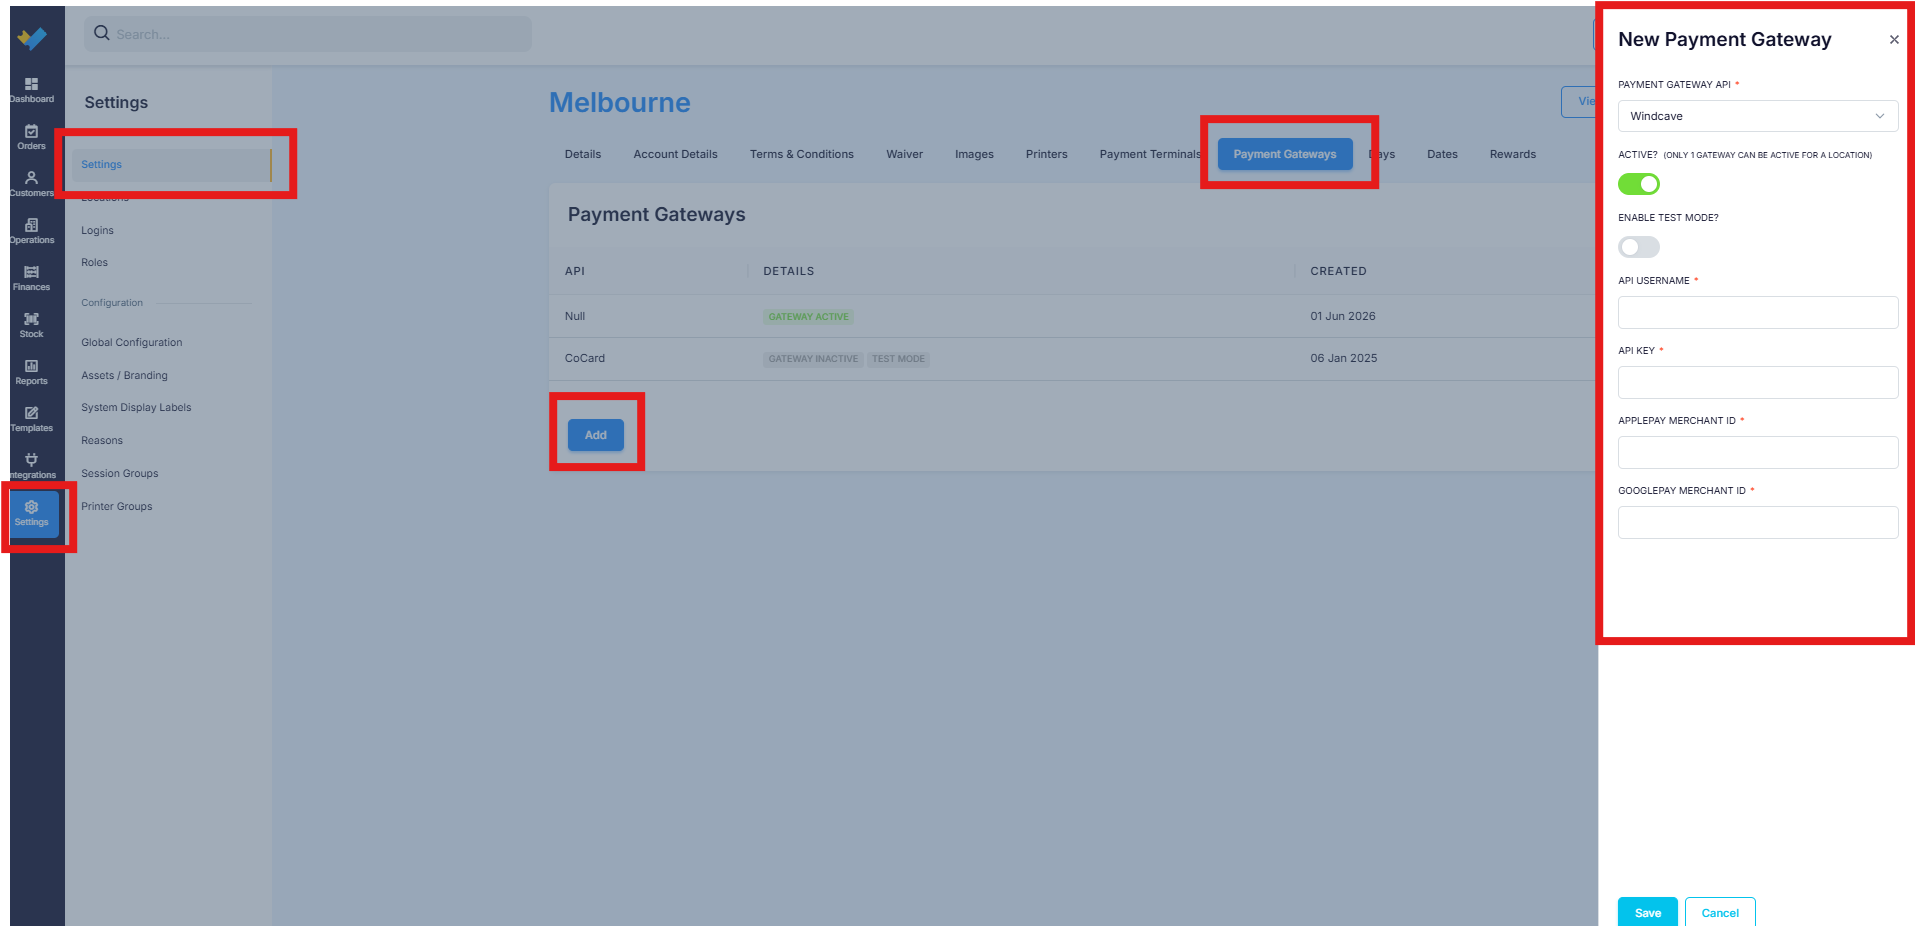
Navigate to Settings > Locations > Payment Gateway.
Click Add and select Windcave under Payment Gateway API.
Enter the API details provided by Windcave:
API Username
API Key
Click Save.
Your Windcave payment gateway is now connected.
Step 3: Add Your Payment Terminals
For each terminal, Windcave will provide a Station ID, User, and Key.
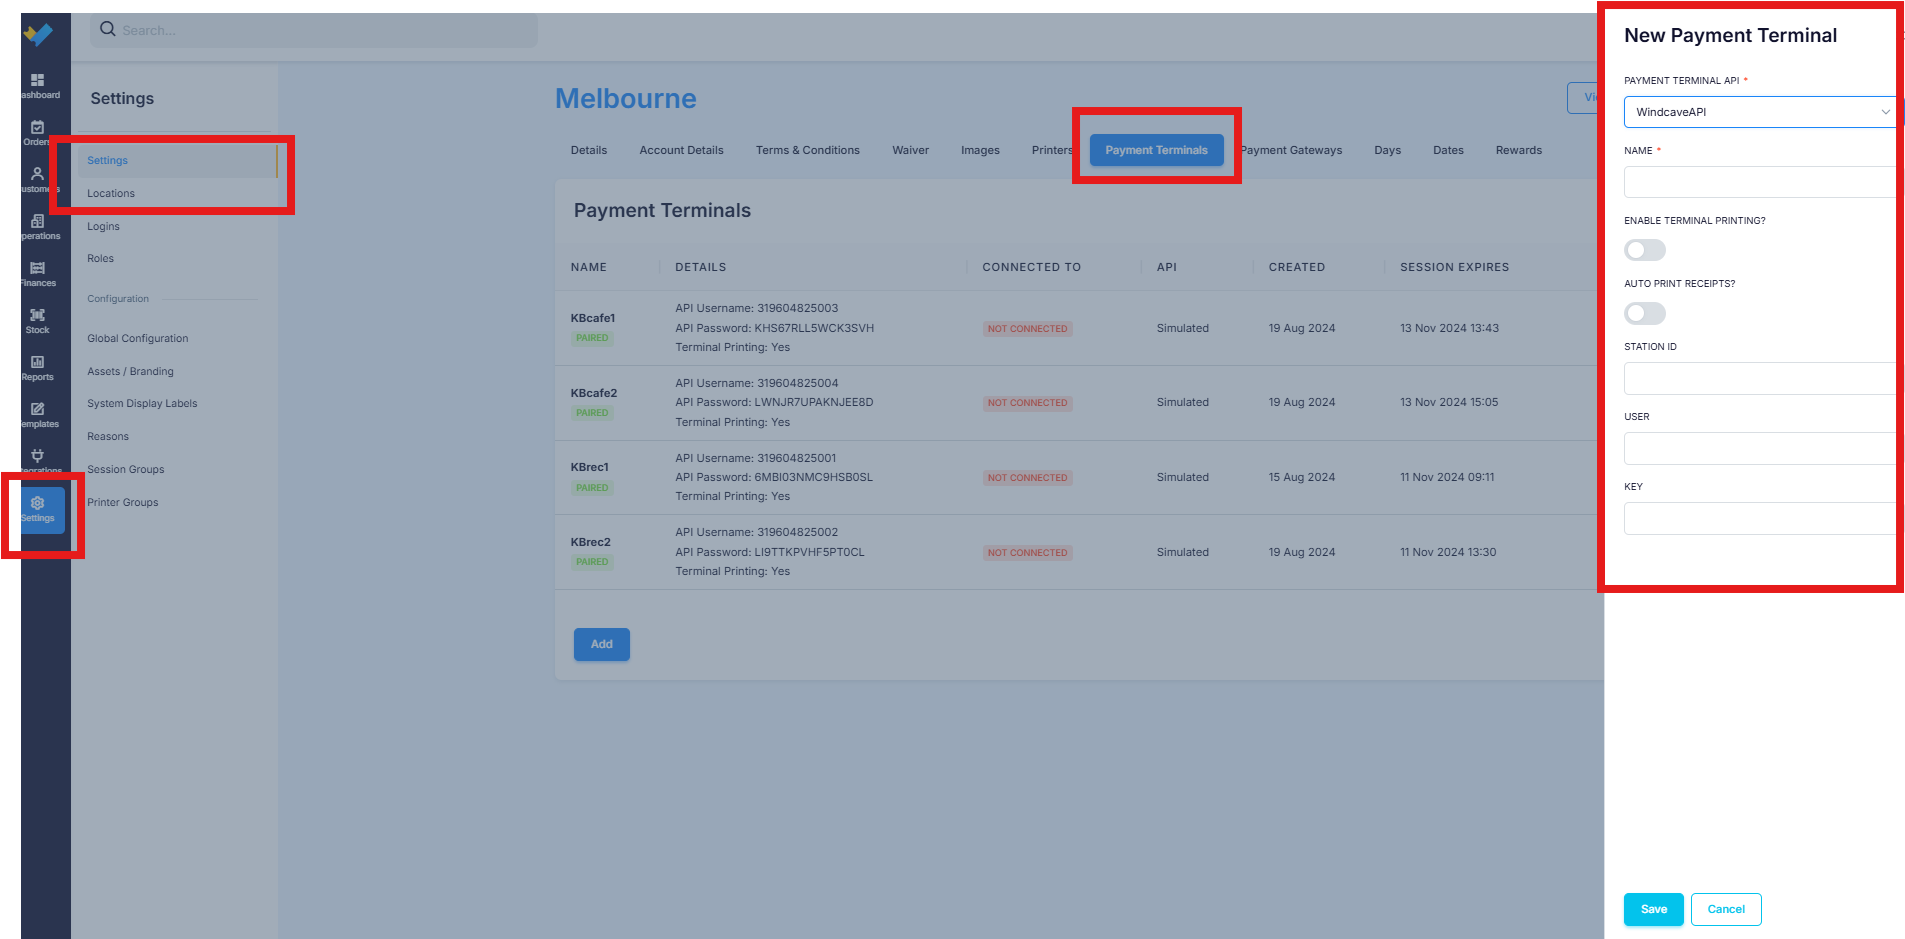
Navigate to Settings > Locations > Payment Terminals.
Click Add and select Windcave under Payment Terminal API.
Enter the Station ID, User, and Key provided by Windcave.
Using Apple Pay or Google Pay? Email support@venuesumo.com and our team will help you enable this on our end.
Not using Apple Pay or Google Pay yet (or still waiting on approval)? Enter a single space in each of those fields to skip this step for now — you can come back and add these details later once approved.
Click Save.
Don't leave the Apple Pay / Google Pay fields completely empty — enter a space in each if you're not using them yet, otherwise the form may not save correctly.
If you are interested in enabling Apple Pay and Google Pay reach out to support@venuesumo.com to assist with setting this up.
Adding a terminal here registers it in VenueSumo, but it won't process payments yet — it still needs to be linked to a POS login. Continue to Step 4.
Step 4: Link the Payment Terminal to a POS Login
Each payment terminal needs to be assigned to the POS login that will use it.
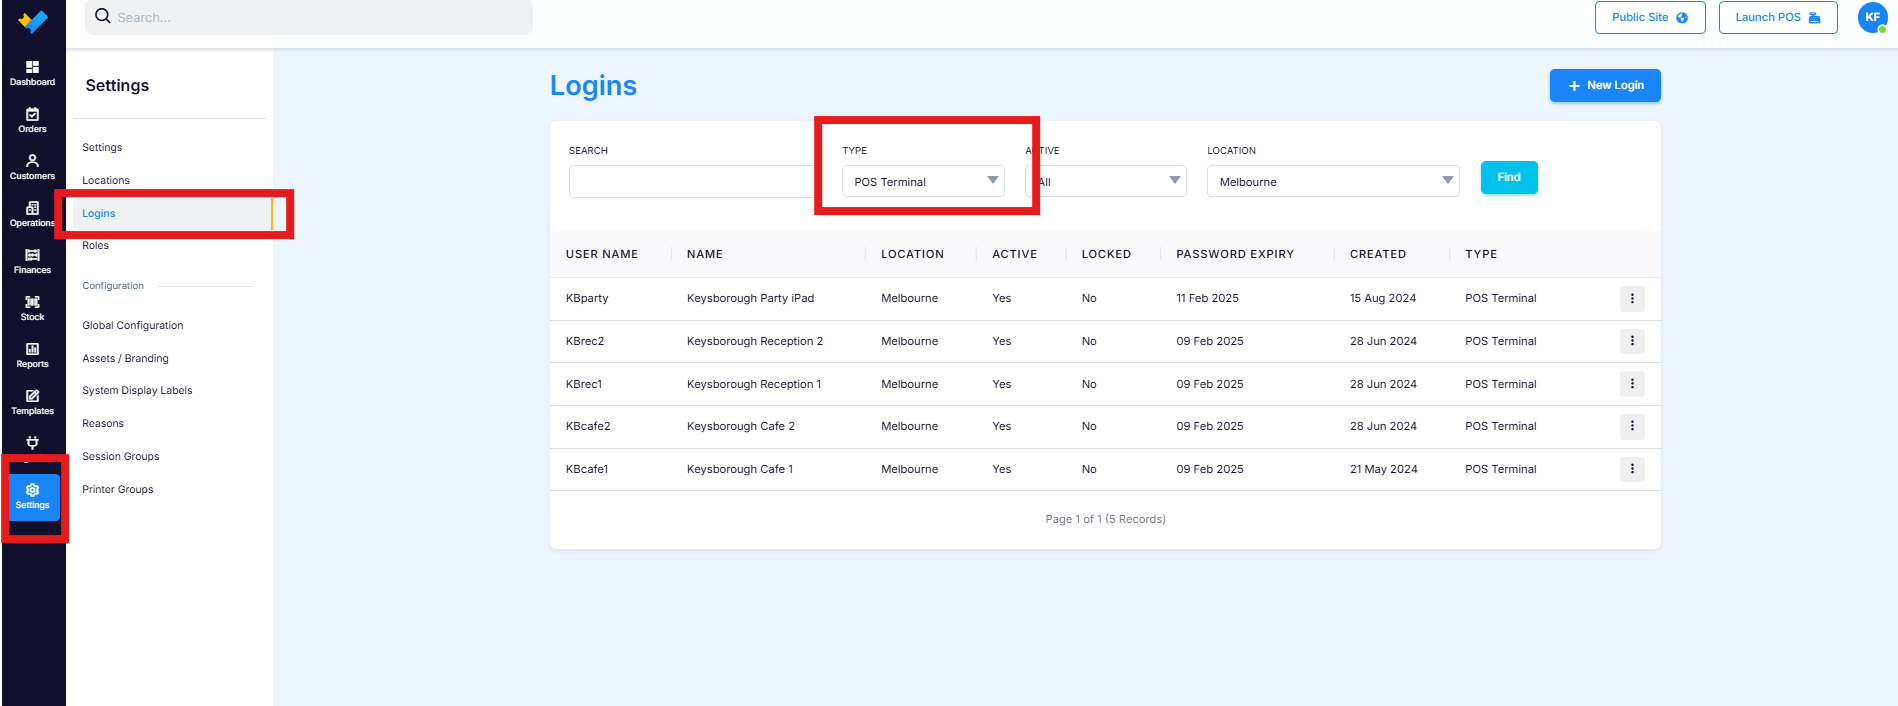
Navigate to Settings > Logins.
Select the POS terminal from the type filter.
Select the POS terminal login you want to link a card terminal to.
In the POS Details section, find the Payment Terminal dropdown and select the corresponding terminal.
Click Save.
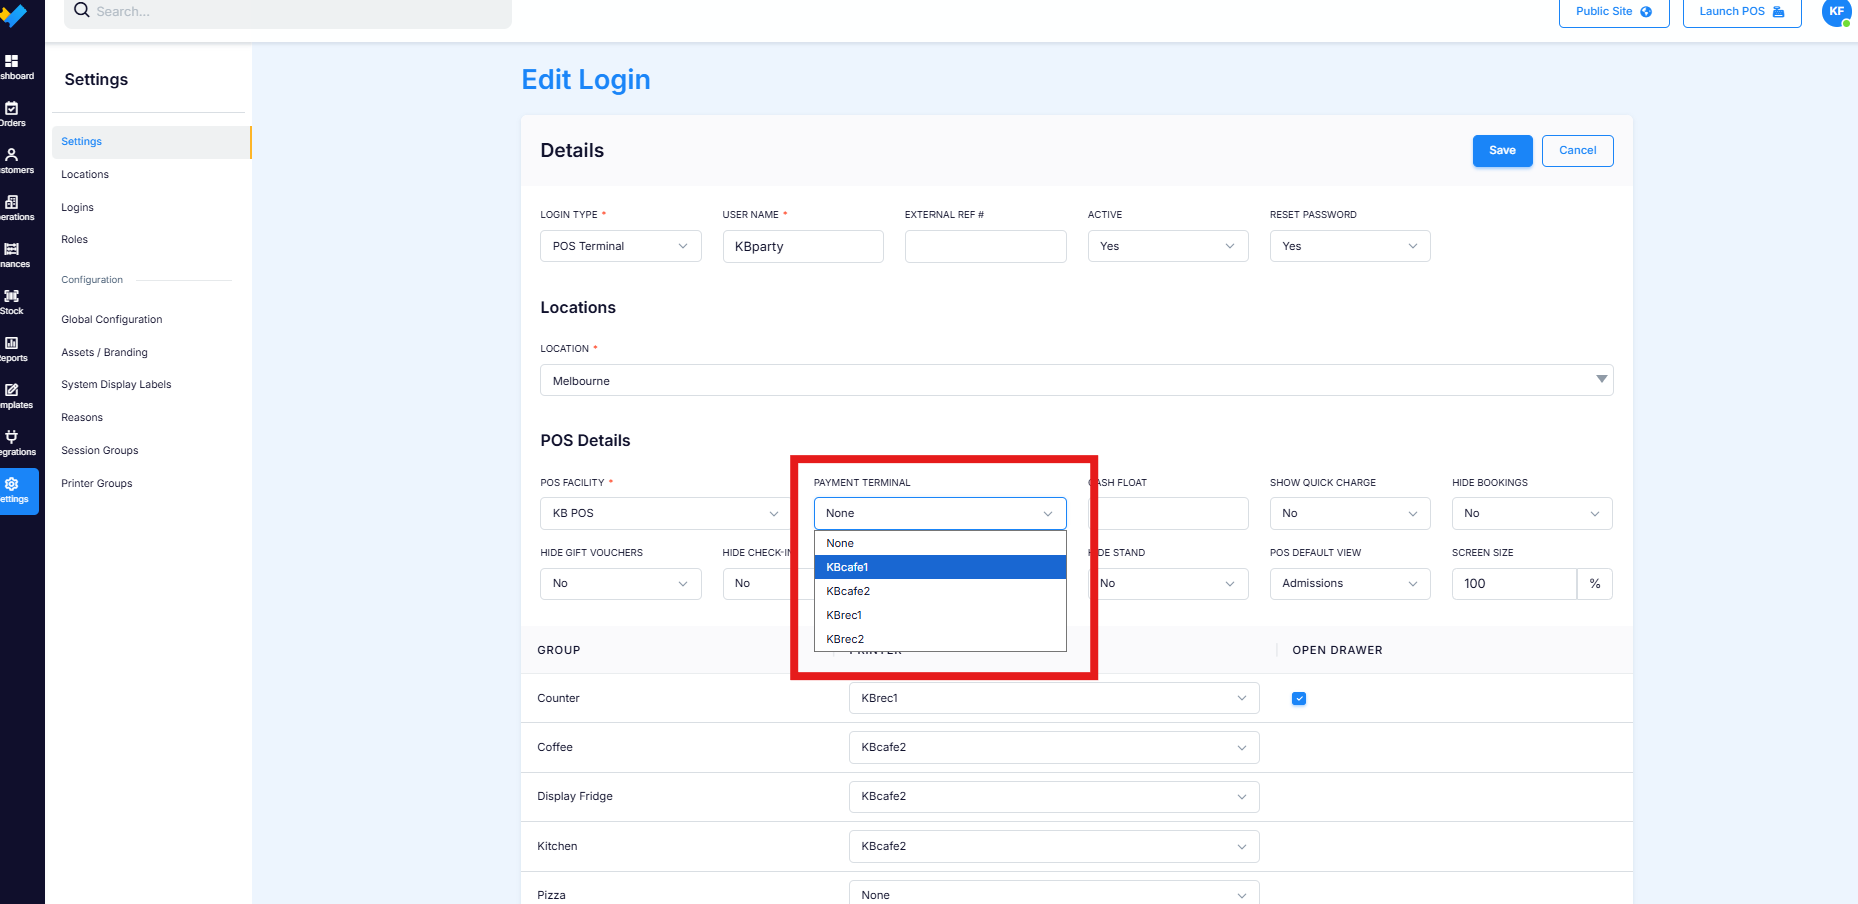
Once linked, process a test order on that POS login — the transaction should appear on the linked card terminal when selecting card as the payment method.
Tips & Common Mistakes
❌ Don't use the "Pair Terminal" button in the payment terminals page. This step is not required for the Windcave integration and can trigger an error. Terminal linking is done entirely through the Payment Terminal dropdown on the Logins screen (Step 4).
✅ Every POS login that needs to take card payments must have a terminal assigned individually — adding the terminal once under Payment Terminals doesn't apply it to any login automatically.
💡 Pro tip: If a terminal isn't showing in the dropdown, double check it was saved successfully under Settings > Locations > Payment Terminals first.
Troubleshooting
Problem | Likely Cause | Fix |
|---|---|---|
Error when clicking "Pair Terminal" | This button isn't part of the Windcave integration flow | Skip this step — link the terminal via Settings > Logins instead (Step 4) |
Terminal added but not receiving transactions | Terminal not linked to the POS login being used | Go to Settings > Logins, select the login, and assign the terminal from the Payment Terminal dropdown |