How to Create Custom QR Codes for Table Ordering
Last updated: May 9, 2026
QR codes on cafe tables make online ordering seamless, enabling customers to browse, order, and pay from their devices. This guide explains how to generate QR codes, including options to display table numbers for table service. Additionally, you can customise the colours and size of the QR codes to align with your branding.
Step 1: Set Up Table Allocations (if needed)
If you are not offering table service, you can skip this step. However, if you are, you'll need to set up table allocations within a new Availability Pool.
- Identify how many tables you have and choose a naming convention. Options include:
- Area-Specific Names: For example, "Garden-01," "Garden-02," or "Patio-01."
Existing Table Buzzer Names: If using radio buzzers to alert customers, name the tables to match each unique buzzer.
- Create Allocations in a new Availability Pool for each of your tables:
- Navigate to SETTINGS → LOCATIONS and select the relevant location.
Click on the POOLS tab and click on ADD POOL .

Create a new pool with an appropriate name (e.g., "TABLES") fill in the relevant fields and click SAVE:
| Name | Tables |
| Tag | Irrelevant |
| Priority | 99 |
| Session Type | Minutes |
| Interval | 30 |
| Default Quantity | The number of tables requiring a QR code |
| Low quantity Warning | Irrelevant |
| Overbooking Qty | Irrelevant |
| Show Pool | No |
| Per Booking | No |
| Use Fixed Times | No |
| Allocation Type | Admin |
| Allocations | Add each table name based on your naming conventions |

- Link the Availability Pool to the relevant location:
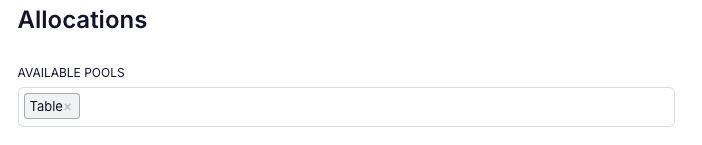
- Navigate to Operations → POS Facilities and select the POS Facility where you wish to configure QR Codes.
Scroll down to the Allocations Section and click on the Available Pools box. A drop-down list of all the availability pools will be displayed. Scroll through the list and select the one named Table (or a similar) that you created.
Step 2: Generate QR Codes
Navigate to Operations → POS Facilities and select the POS Facility where you wish to configure QR Codes (or stay there if you have just completed Step 1)
Click on View QR Codes:

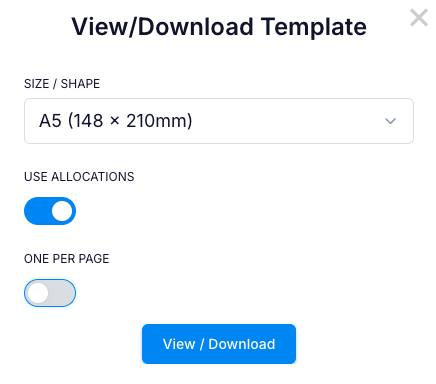
Select Size and Shape: Choose from the following options:

If you are not using Table Allocations, set Use Allocations to NO:
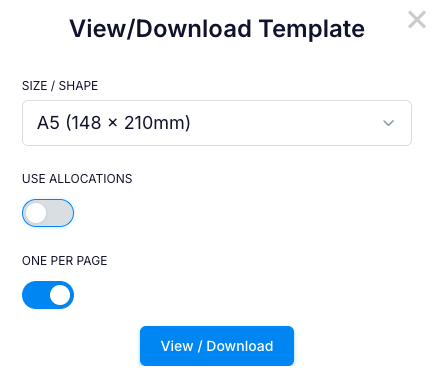
If you would like multiple QR Codes printed on one Page, set ONE PER PAGE to NO:
Note: The image used is the PRINT LOGO image
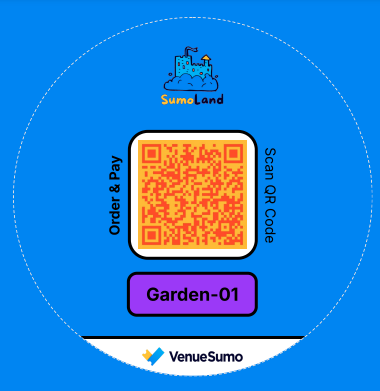
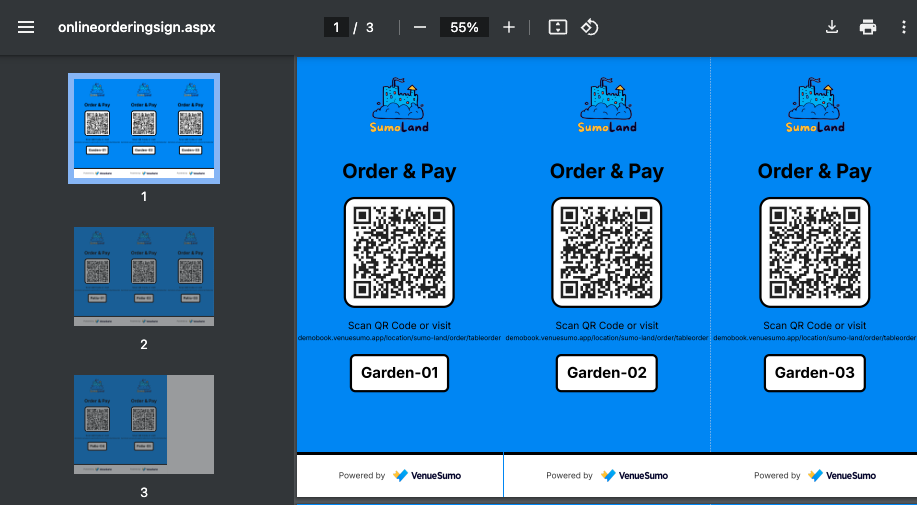
Sample: A5 (148 x 210mm) , Use Allocations = Yes, One Per Page = No:

Sample DL (99 x 210), Use Allocations = Yes, One Per Page = No:
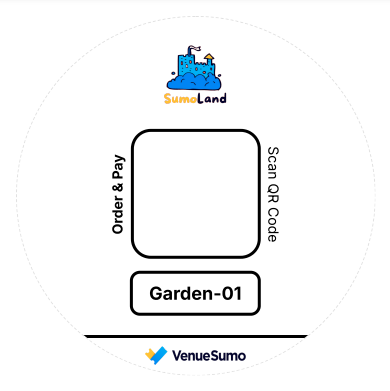
Sample Coaster (Square), Use Allocations = Yes, One Per Page = No:

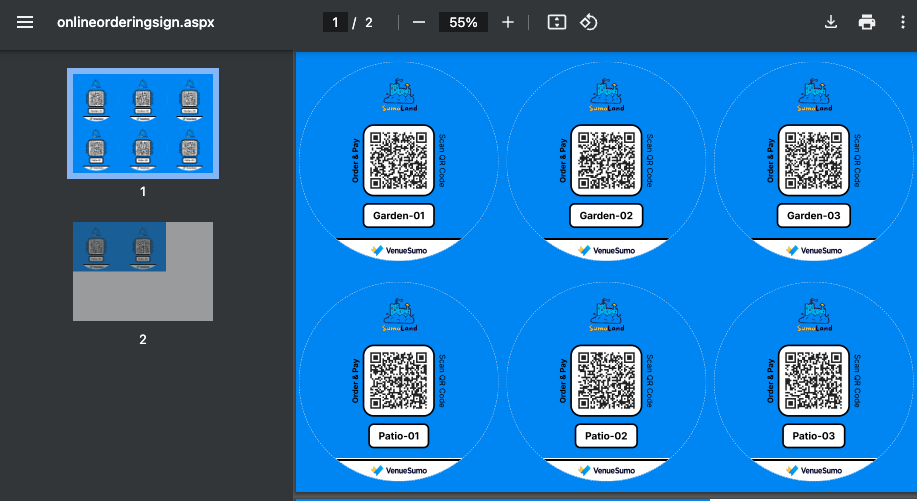
Sample Coaster (Circle), Use Allocations = Yes, One Per Page = No:
Step 3: Customise the colours
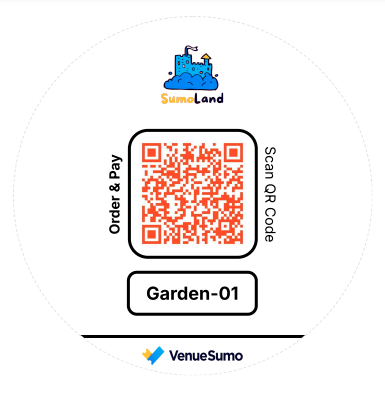
The default colours for the QR Code and it's background are black and white. If preferred, these can be customised.
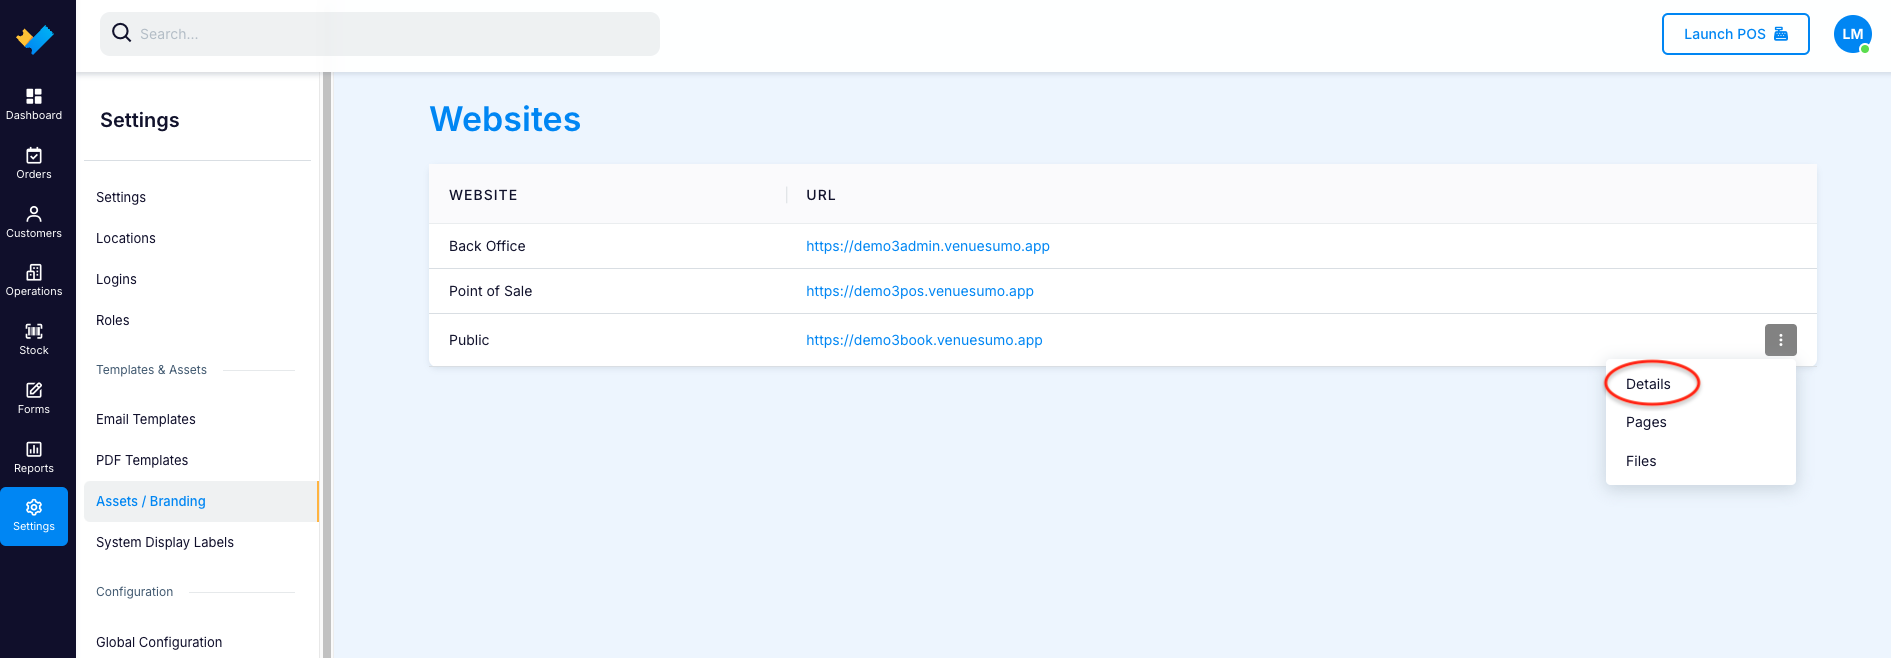
Navigate to SETTINGS → ASSETS & BRANDING, click on the hamburger icon next to the Public Website and then click on Details
- Scroll down to the "Sign" Colours.
- If all the colours were changed to white, this is what the QR Code would look like:

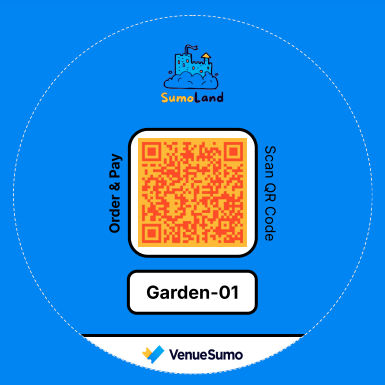
- If the colours were changed as follows, this is what the QR Code would look like:
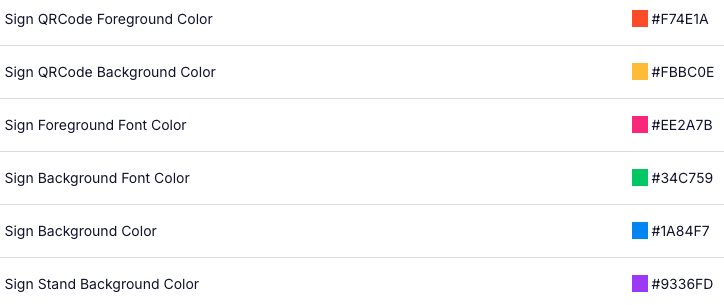
Changing Sign QRCode Foreground Colour to #F74E1A (orange):
Changing Sign QRCode Background Colour to #FBBC0E (yellow):

Changing Sign Foreground Font Colour to #EE2A7B (pink):
(add image)
Changing Sign Background Font Colour to #34C759 (green):
(add image)
Changing Sign Background Colour to #1A84F7 (blue):
Changing Sign Stand Background Colour to #9336FD (purple):