How to create a surcharge on Public Holidays for POS Products
Last updated: May 10, 2026
Navigate to FINANCES -> FEES

- Select the location that requires the fee
- Click on the "New Fee" button and fill in the boxes as follows:

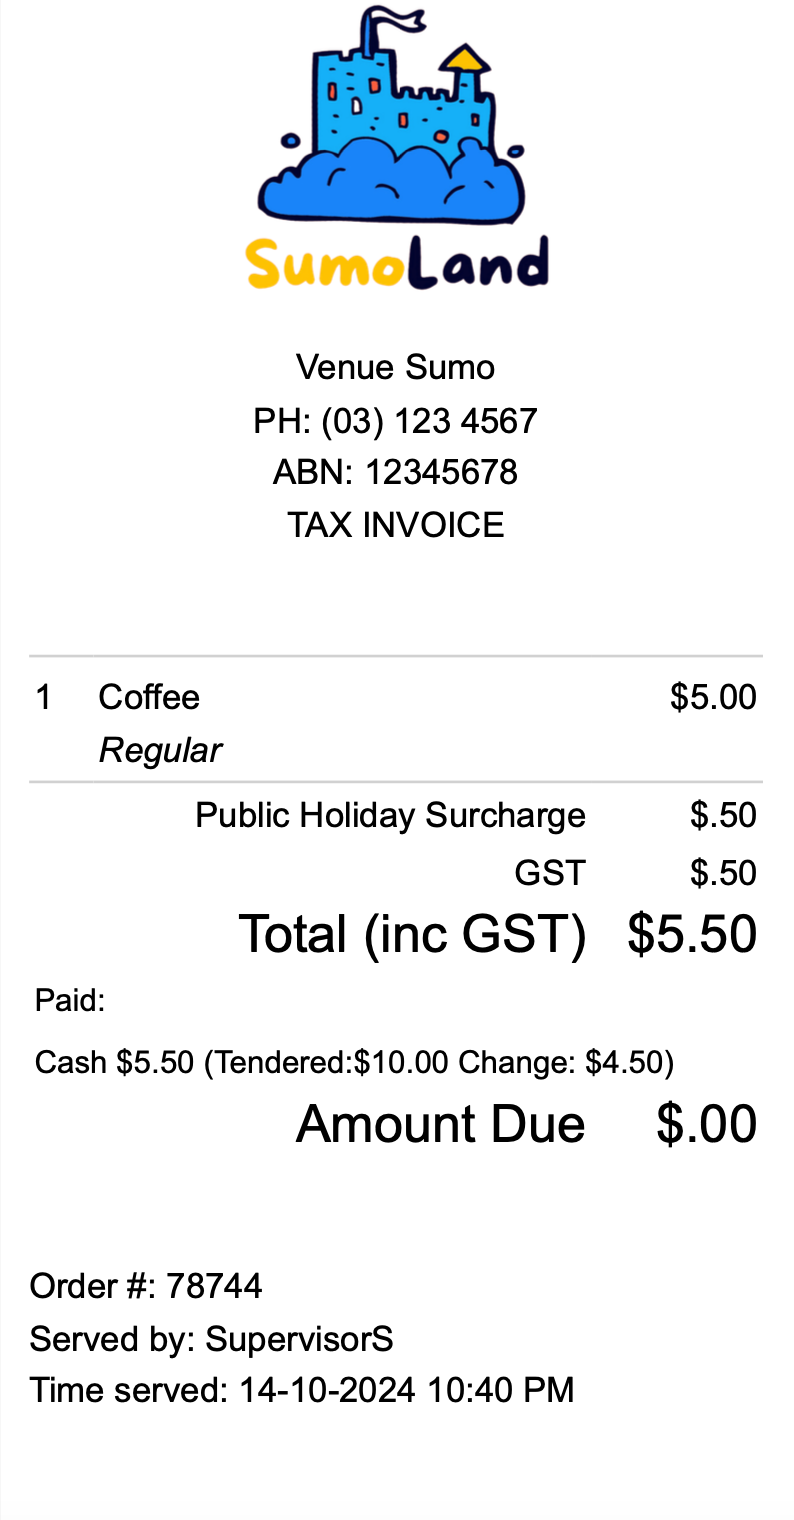
- Set NAME to "Public Holiday Surcharge" or another relevant name, as it will appear on the receipt if requested by the customer
- Set TYPE to Surcharge (surcharge will only apply to POS Products sold at a POS Facility)
- Set AMOUNT TYPE to Percent
- Set AMOUNT to the surcharge percentage
- Set your TAX CATEGORY to GST or GST Exempt as required
- Set GL ACCOUNT CODE if required
- Set STOP SELL to No, change it to Yes if you want to disable the Sunday Surcharge
- Set REMOVABLE to No (If REMOVABLE is changed to YES, the POS Operator will be able to remove the surcharge)
- Set REQUIRE SUPERVISOR PIN to No. This setting has no effect unless REMOVABLE is set to Yes. At that point, change it to Yes to require a supervisor's approval for removing the surcharge from the transaction
- Leave EVENTS, FACILITIES, POS FACILITIES, BOOKING SOURCES, PAYMENT METHODS and PRODUCT TYPES blank
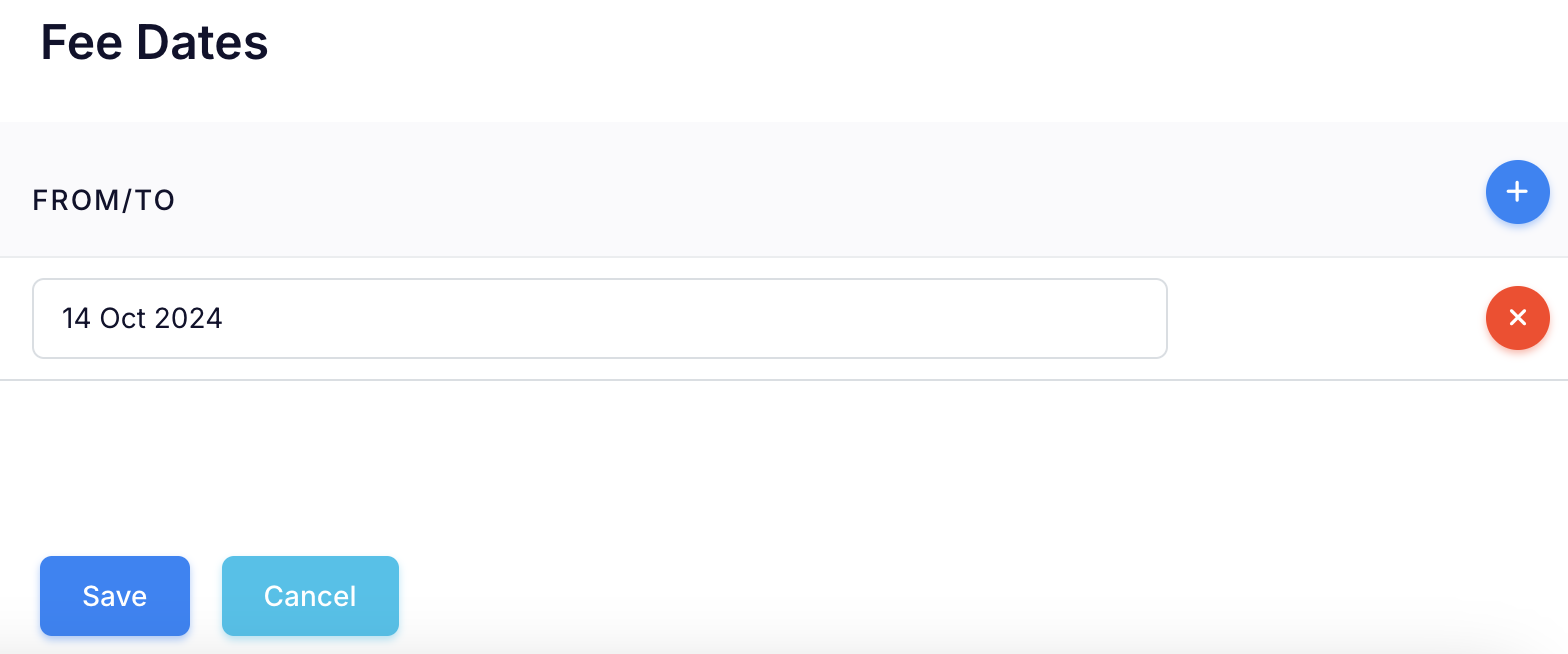
- Scroll down to Fee Dates
- Click on the plus sign button to add public holiday dates
- Select the start and end date
- For a single-day public holiday, click the same date twice
- Keep pressing the plus sign button each time you want to add another public holiday
- Press the Save button
- The Public Holiday Surcharge is now activated and will automatically apply at POS
NOTE: The surcharge will not apply to sales made ONLINE or in ADMIN. This is because the FEE DATES specified determine when the surcharge is applied. If a future booking is made on a date with an applied surcharge, it may lead to incorrect charges.
How will the surcharge be shown in POS?
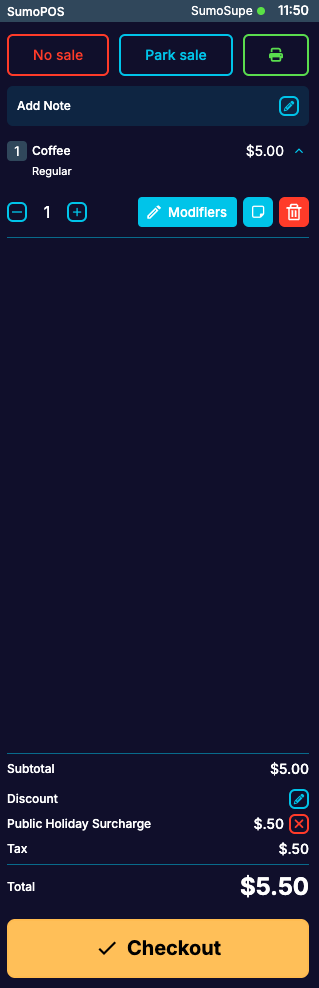
Customer Receipt