How To Set Up Booking Notifications
Last updated: September 15, 2026
This article shows you how to receive an email notification whenever a booking is made. There are two parts to set up: the email address that receives the notifications, and which facilities and booking sources trigger them.
Part 1: Set the notification email address
Notification emails are configured per location, so if you manage multiple locations you'll need to set this up for each one separately.
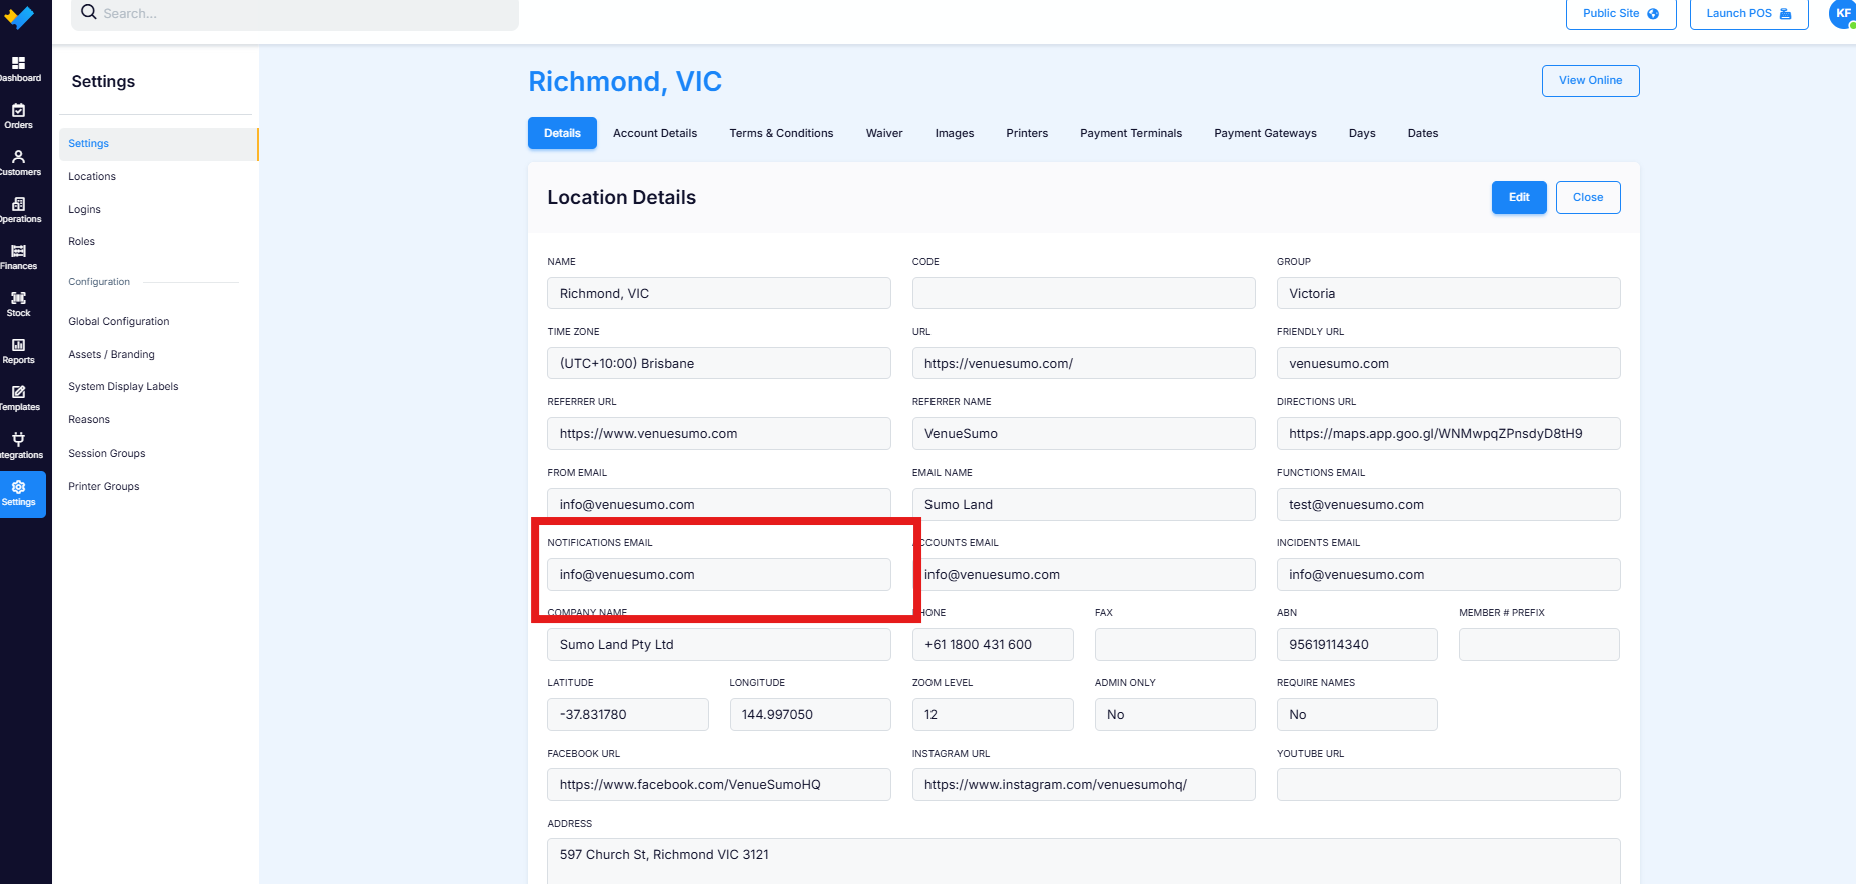
From Back Office, go to Settings > Locations.
Select the location you want to set this up for, then open the Details tab.
Select Edit.
Scroll to the Email Addresses section.
In the Notifications Email field, enter the email address that should receive booking notifications for this location.
Select Save.
This field is optional. If it's left blank and a facility has notifications set to active (see Part 2), the notification email will be sent to the From Email address instead. You can enter any email address in the Notifications Email field, including a shared inbox or distribution list.
Part 2: Enable notifications per facility and booking source
You also need to turn on notifications for each facility, and choose which booking sources should trigger them.
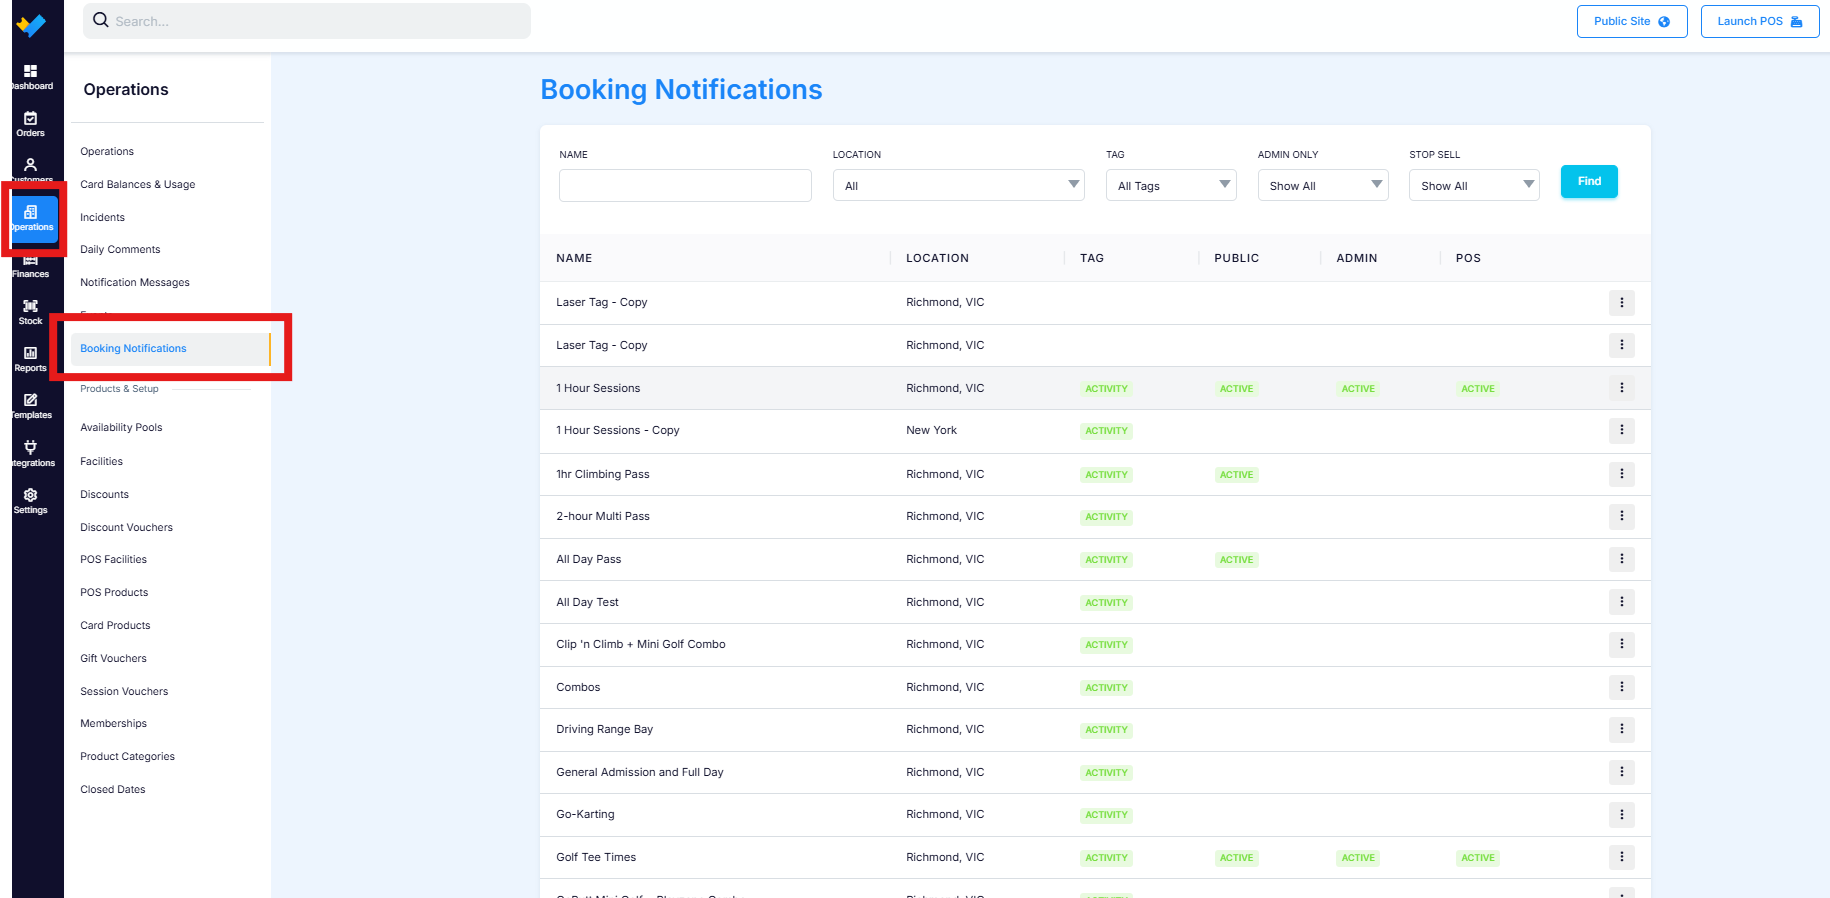
From Back Office, go to Operations > Booking Notifications.
Find the facility you want to set up a notification for.
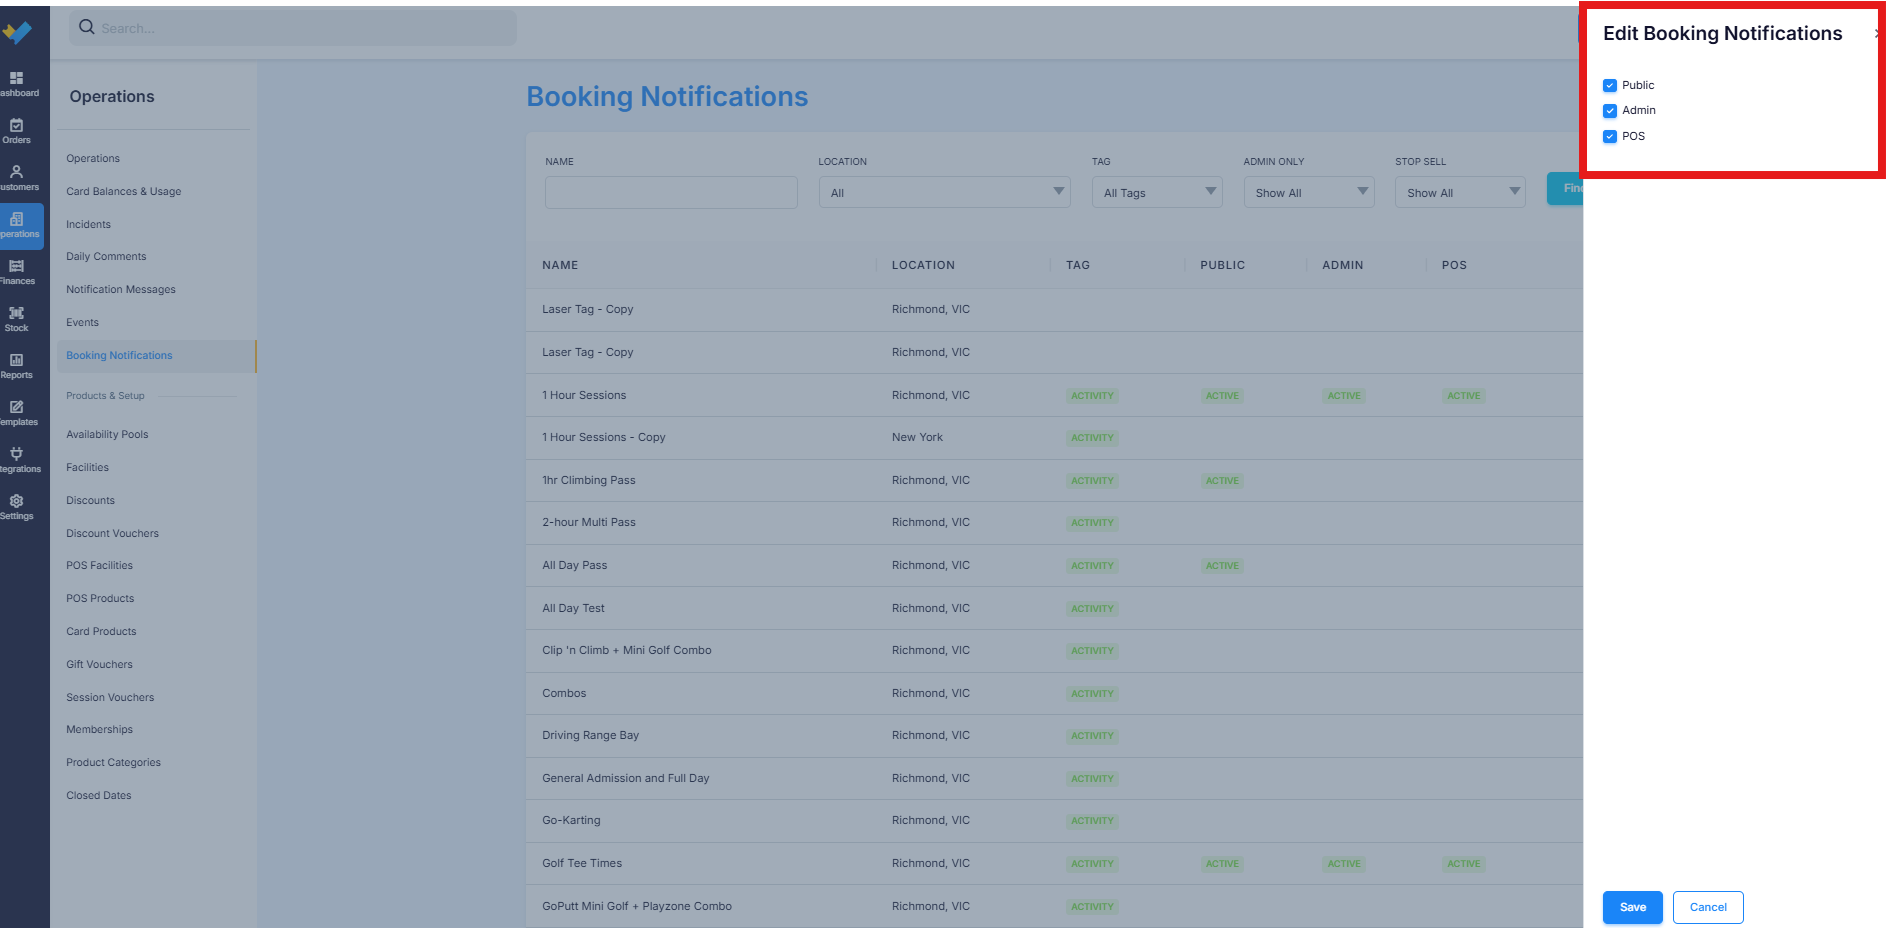
Select the ⋮ menu on that facility's row
Toggle notifications on for whichever booking sources should trigger an email:
Public — bookings made on your public booking site
Admin — bookings made by staff in Back Office
POS — bookings made at the point of sale
Save your changes.
Facilities with an active source show ACTIVE in the corresponding Public, Admin, or POS column on the list. A facility with none of these enabled won't send a notification email for that facility.