How to make an admissions sale in POS
Last updated: May 10, 2026
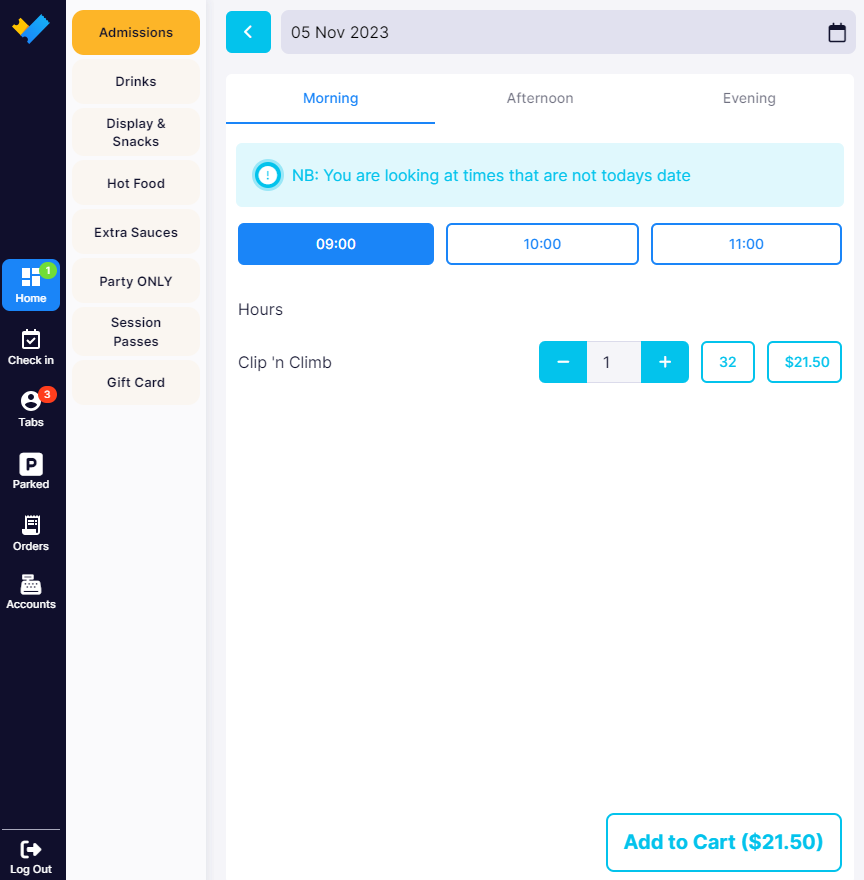
1. Select an "Admission" product from your POS.

2. Select an admission time.
Choose how many participants (e.g. "1").
And click the "Add to cart" button.
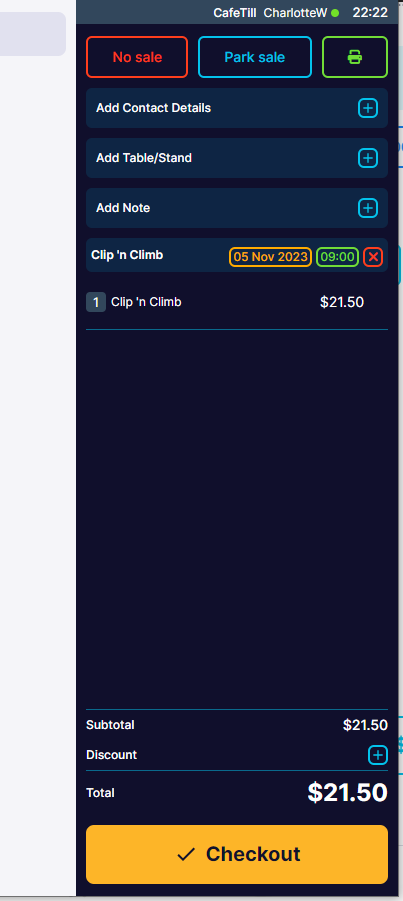
3. Click the "Checkout" button.
4. Choose a payment method and complete as per the instructions within "How to make a sale on the POS".

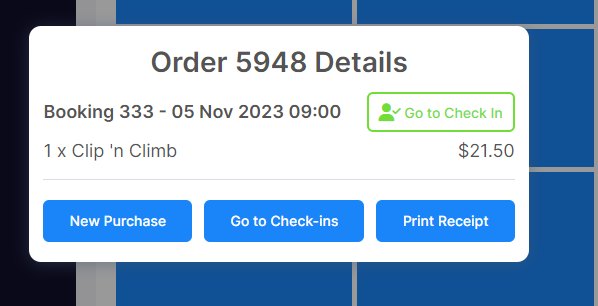
5. Once the payment method has been successful, you will get a popup screen with the "Order Details".
To checkin the guest, click "Go to Check In".
You can also create a "New Purchase" or "Print Receipt" if needed.
6. If your product is linked to a Waiver form you will need the guest to sign, prior to check-in.
This can be done in two ways:
(a) use the "Send Waiver" button; or
(b) print a QR code with the link to your location's generic waiver form.
NOTE - orders completed online with a waiver form signed will not need to complete this step, as the waiver will already be linked to the booking.
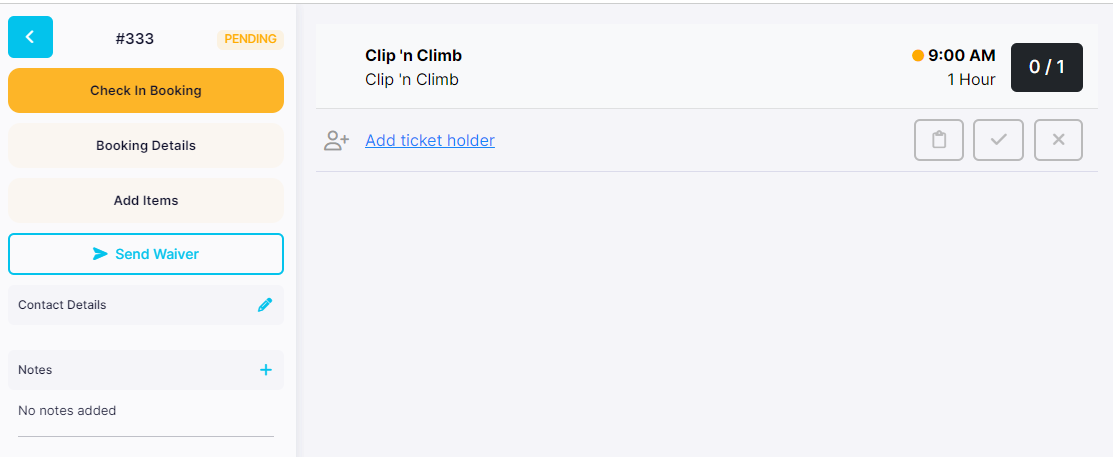
7. Use the "Send Waiver" button
Clicking the "Send Waiver" button will popup a request for the guest's email address.
(a) The "Send Email" button will send the waiver to the guest, which will be linked back to the booking. This can take a couple of minutes for the guest to receive the booking on their phone.
(b) The "Open Link" will open the link to the booking linked waiver form in a new window on the browser that is using your POS. If you're using a tablet device it could be easy for you pass that to the guest to complete their waiver.

"Open Link" will take your POS terminal screen to the Waiver in a new tab. You will need to pass control of the terminal to the Guest to sign.

Once the waiver has been completed. Click "Cancel" button to return to the "Checkin".
Then "refresh" the browser.
The "ticket holders" and "waivers" will now appear and ready to be "Checked In".

8. "Print a QR code with the link to your location's generic waiver form."
Some venues find it quicker to have a QR code printed on their check-in counter which is linked to your 'generic waiver form'.
For most venues, your generic waiver form will be:
https://INSERTYOURVENUEbook.venuesumo.app/form/?FormID=1

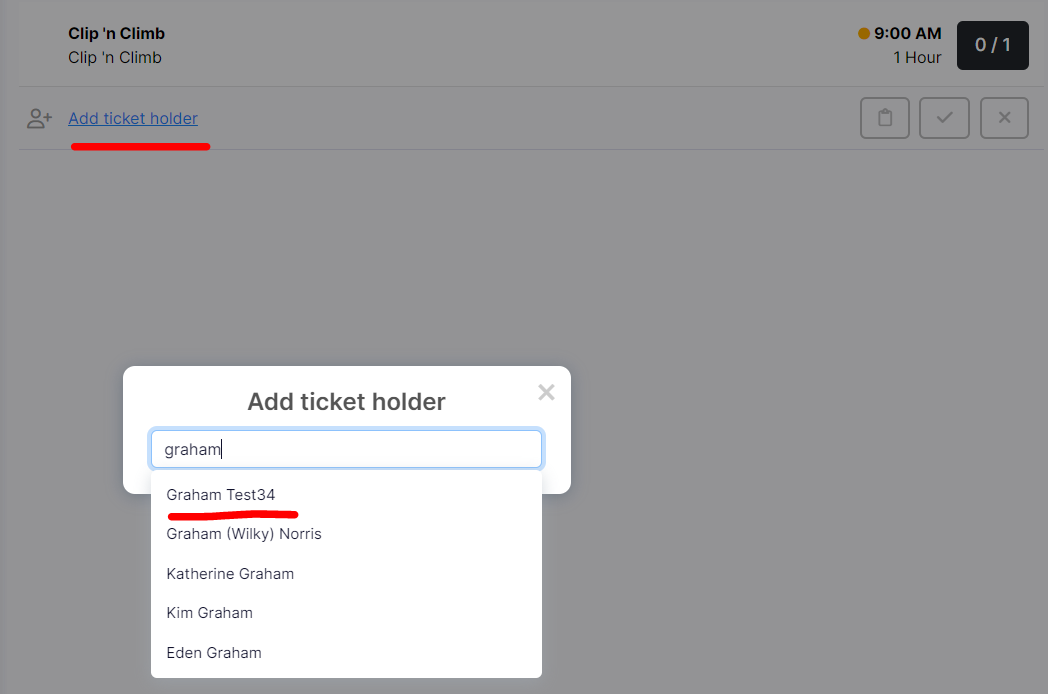
8 (a)
Once the guest has confirmed they have completed the waiver and reached the "Thank You" screen the waiver is in the system and able to be linked to the admission.
Ask the guest for the first and last name they used when signing the waiver.
Click the "Add ticket holder" hyperlink and within the popup search
8 (b)
This will add the ticket holder the admission and you're ready to click "Confirm Checkin".
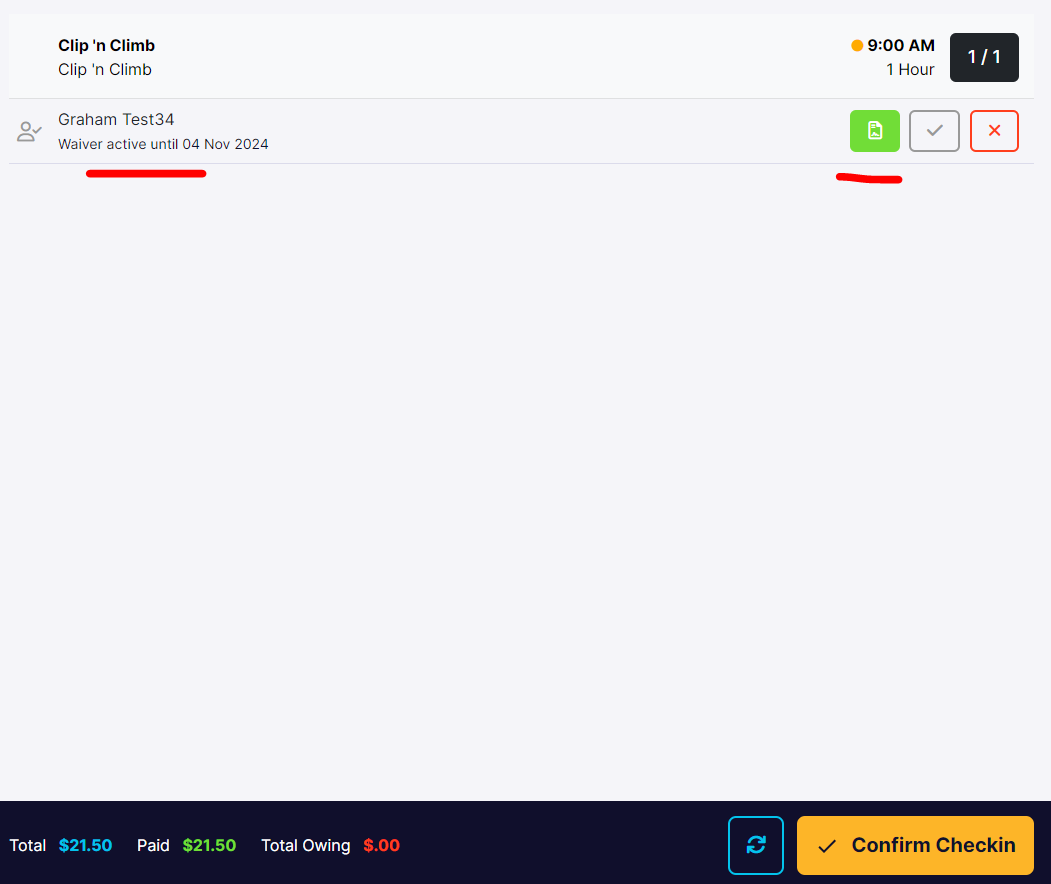
8 (c)
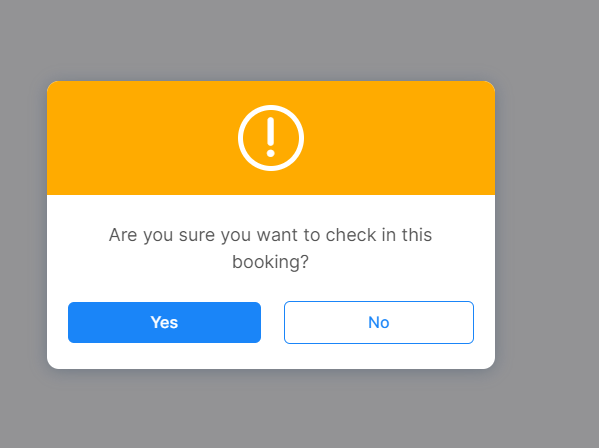
You will be asked to confirm you want to proceed with the checkin, click "Yes".